
Introduction
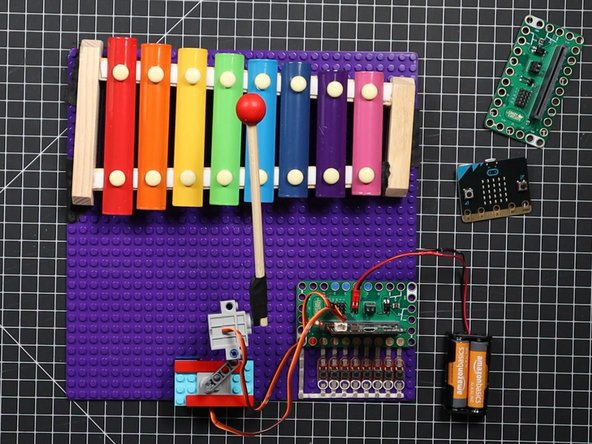
Using our Bit Board with a micro:bit you can build an automated xylophone that can play songs by activating a servo with a mallet mounted onto it.
Video Overview
Featured Document
-
-
You'll need a xylophone for this project. We found a toy xylophone that was small enough to ensure our servo could swing the mallet into position above each bar.
-
To test the angle and reach we loaded a photo of the xylophone and mallet into our image editing software and rotated the mallet to check things out. (You could also print it and cut it out from paper to test things.)
-
-
-
To get our mallet to swing left and right as well as up and down, we'll be putting one servo on top of another.
-
Since we're using LEGO compatible servos the easiest way to mount them is with... LEGO!
-
Here are the LEGO parts we used to hold our arm servo down to a LEGO baseplate:
-
-
-
-
-
-
Once we get our arm servo mounted to our LEGO baseplate we'll need to attach our mallet servo onto it.
-
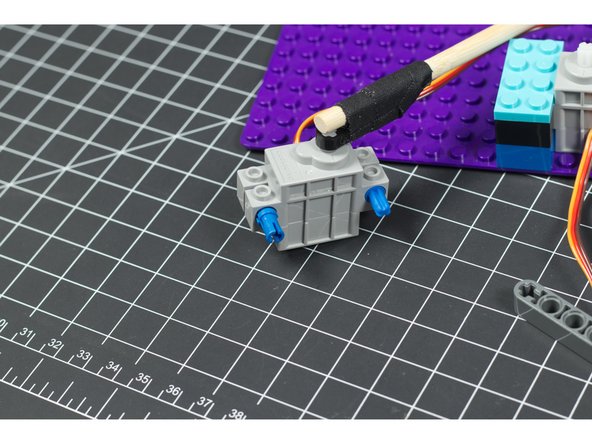
To attach our mallet servo onto our arm servo we use three more parts:
-
-
-
-
The two LEGO pins will allows the mallet servo to attach to the LEGO Beam which then attaches to the arm servo.
-
Like with all LEGO projects part of the fun/challenge is how you build it and make it your own. If you don't have the same LEGO pieces we used try to build it with what you do have available.
-
-
-
We attached our mallet to a small LEGO beam with some tape. We found this worked well because it wasn't too rigid, and allowed the mallet mechanism to flex a bit when it hits the bars.
-
If you're connection is too rigid and you don't calibrate your mallet servo properly it may stress the servo by overworking it. We've also compensated for this with a somewhat "loose" connection point between the two servos.
-
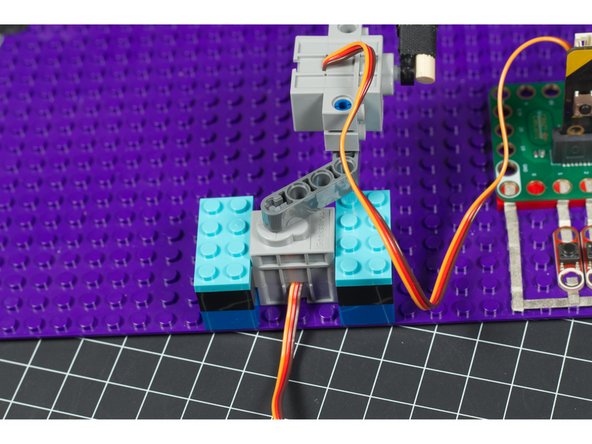
Once you've got the mallet and beam put together you can attach the mechanism to the arm servo.
-
-
-
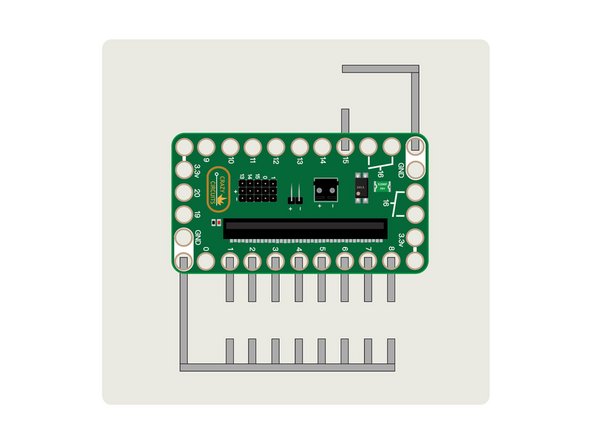
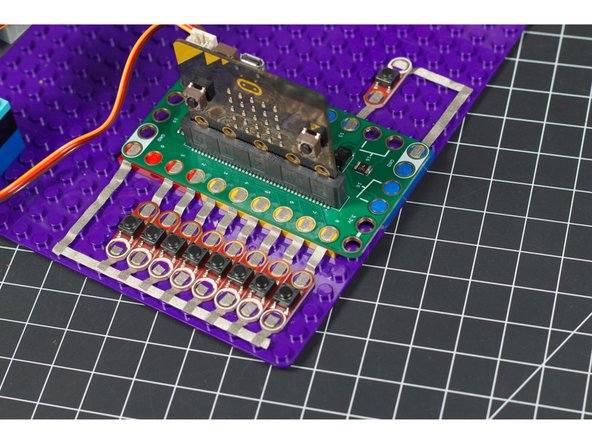
After you get your Bit Board onto a LEGO baseplate you can use 1/8" Maker Tape to layout the connections to the buttons.
-
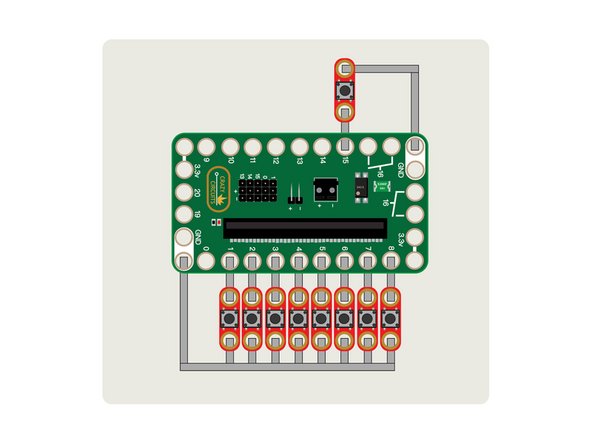
We're going to add 8 pushbuttons to our circuit, each of which will trigger the mallet to strike a different note.
-
We will also add an additional button to Pin 15 which will allow us to play our secret song at the push of a button.
-
-
-
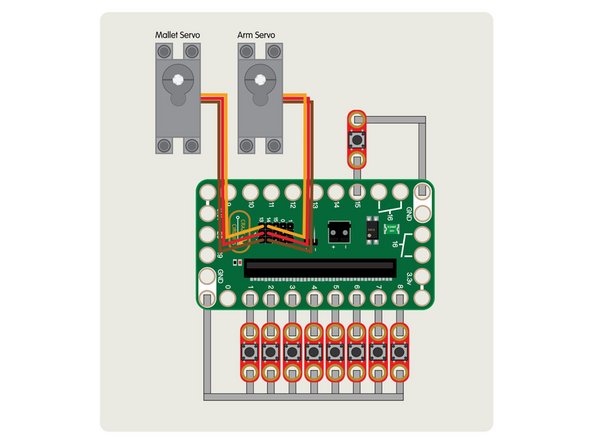
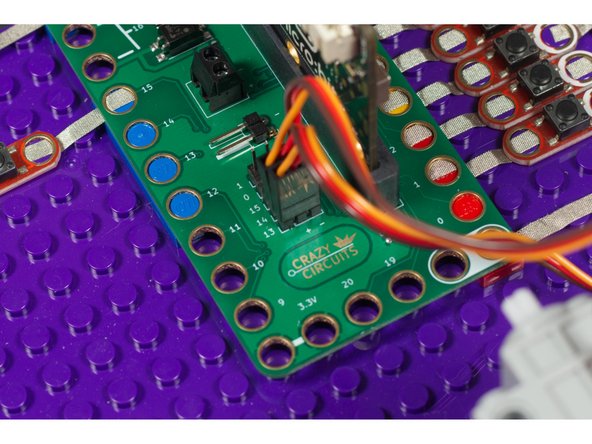
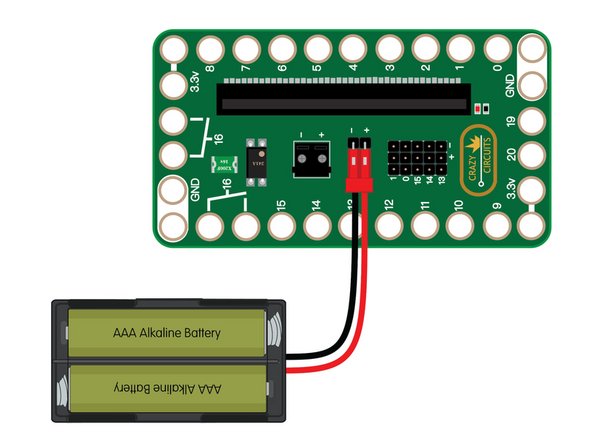
The servos have three wires connected to them that terminate in a black connector plug. This connector is what we will plug into the Bit Board header pins.
-
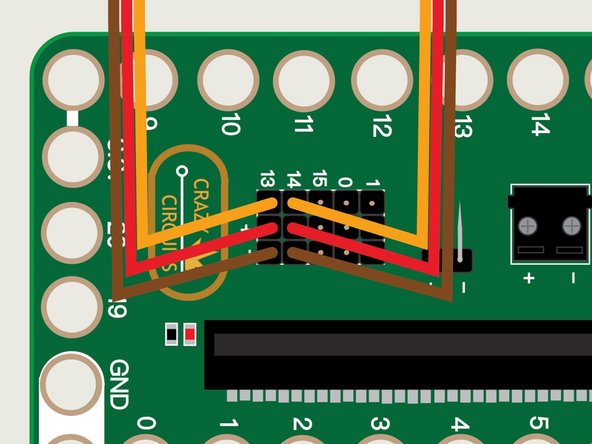
Connect the arm servo to Pin 14 on the Bit Board, then connect the mallet servo to Pin 13 on the Bit Board.
-
Make sure the brown wire of the servo connector is plugged into the - (negative) row and the red wire of the servo is plugged into the + (positive) row. The orange wire will be closest to the 14 or 13 numbering on the board.
-
-
-
Connect a USB cable to the micro:bit and then plug it into your computer.
-
We'll be using makecode.microbit.org to program our board. It uses a simple drag and drop block interface.
-
We're going to load the following code for our Xylophone program: https://makecode.microbit.org/_LxxCDwUyC...
-
While you do the servo calibration in the following steps you'll need to have a battery pack plugged in so the servos have power to move.
-
Keep the USB cabled plugged in as well so you can easily upload new code to the micro:bit as you do the calibration.
-
-
-
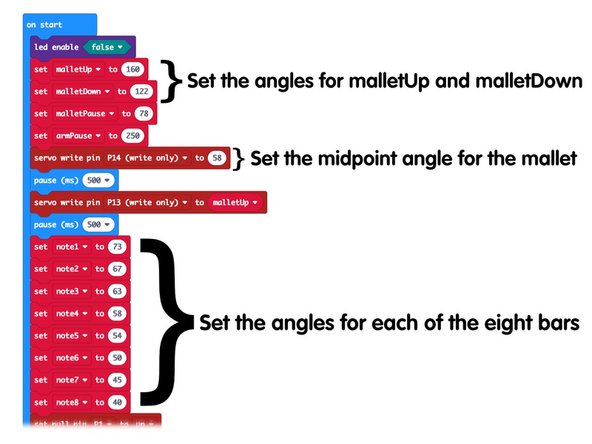
Once you have the code loaded you can start testing things to determine what angles you'll need to set for the mallet to do its job.
-
You will need to determine the up and down angles of the mallet for the mallet servo, and the angles left and right that are needed to position the mallet over each bar.
-
-
-
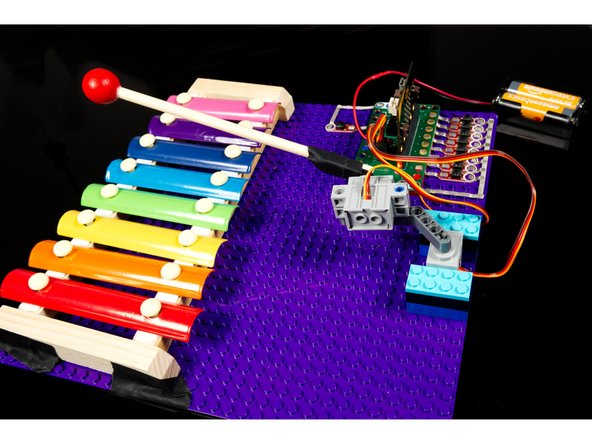
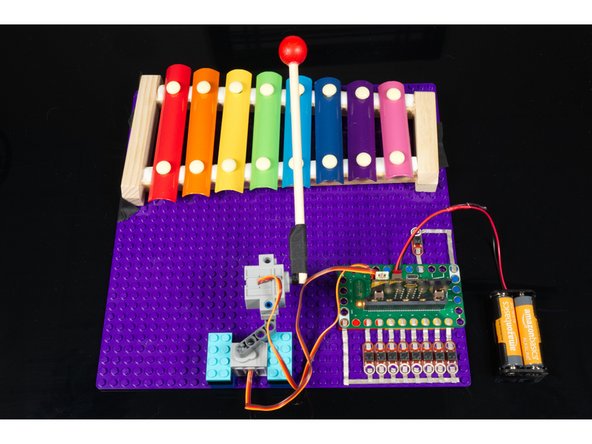
Once you've got your xylophone circuit built, all the LEGO pieces, and your code is loaded... try it out!
-
We taped out xylophone down to the LEGO baseplate once we found the optimal position for it.
-
If things don't quite work, you may have to adjust some of the numbers in the code.
-
-
-
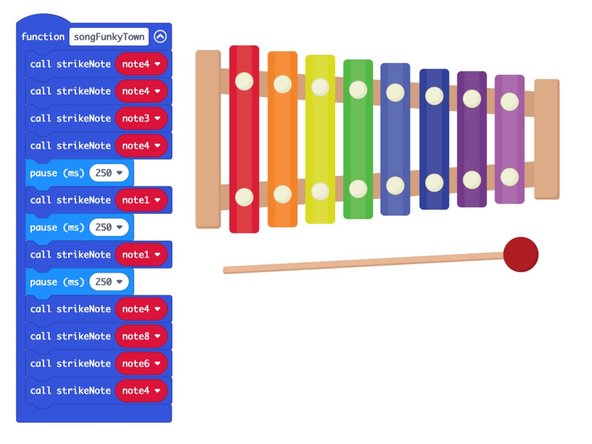
We've got a special function in our code called songFunkyTown which will play the notes to the popular 1980's hit by Lipps Inc. when you press the button connected to Pin 15.
-
You can add more functions to your code and then change it so Pin 15 triggers the song you want. (Or add more buttons to have a larger song selection.)
-


Cancel: I did not complete this guide.
One other person completed this guide.
Attached Documents
