Introduction
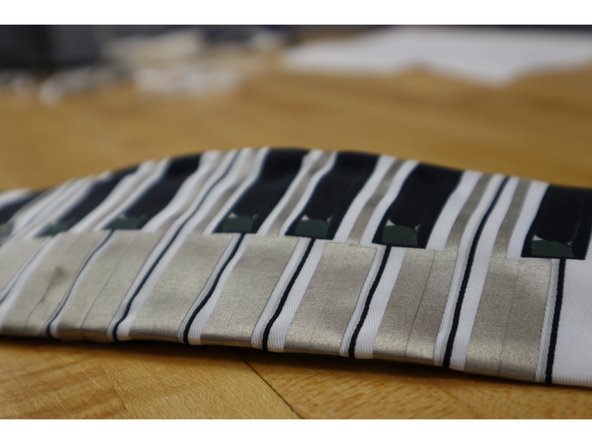
The 1980s brought about many great achievements in fashion and music. There was synth music, the funky keytar, leggings, and the classic men's Piano Necktie. These ties were worn ironically (and unironically) by many fashionable (and unfashionable) men and women. They projected a statement of "I'm wearing a tie, but on MY terms."
Now that we've had some years to improve our fashion senses it's high time we repurposed those old piano neckties into something more 21st century! That's why we turned a dull piano necktie into an actual working piano necktie using a Crazy Circuits Invention Board and a whole bunch of nylon conductive Maker Tape.
This project is extremely simple to build. It requires zero programming skills and zero sewing skills since we're not actually sewing anything! If you can apply tape to a neck tie you can build this project. It's a great beginner project for anyone interested in fashion, wearable technology, basic programming, or living life 80s style.
Video Overview
-
-
The only way to really screw up this project (and waste a bunch of time) is by placing the Invention Board in the wrong spot.
-
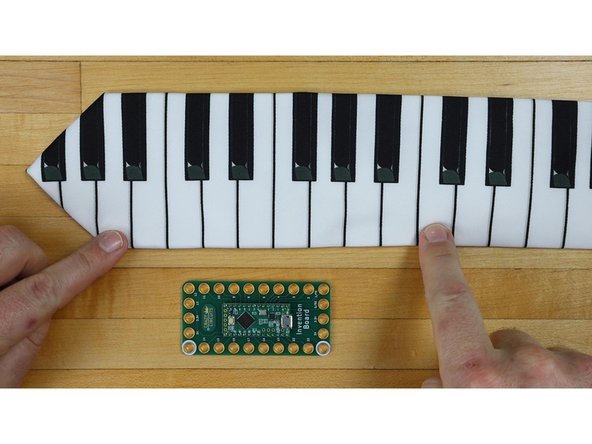
Below are the three key pieces of this project:
-
First, tie your tie. Make sure it's at a good length for you.
-
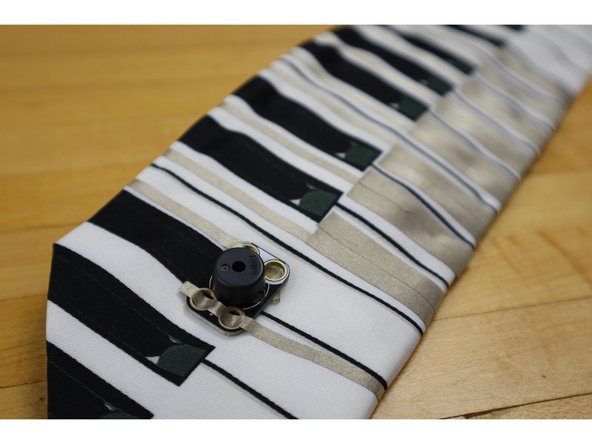
Second, decide which keys you want to use. You can have up to 11 keys for this project but we'd recommend just sticking with 8. Figure out where to stick your Invention Board based on which keys you're going to use.
-
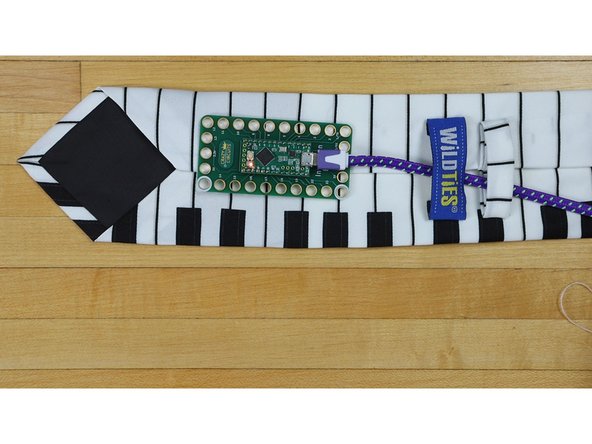
Lastly, decide how you're going to power this project. We used a small lithium Power Bank and a long USB cable that we ran through our shirt. If you have a super small power bank you could in fact attach it to your tie. Otherwise shirt pockets or jacket pockets work equally well.
-
-
-
Download the Arduino IDE software if you don't already have it.
-
At the core of the Invention Board is a Teensy LC. You'll need to download the Teensy add ons for Arduino from PJRC.com in order to get things uploading. (If you want to use a raw Teensy try soldering wires to it to break out the capacitive touch pins, then run conductive tape from those wires to the front.)
-
Copy and Paste our code. Choose the Teensy LC in the Arduino IDE and Upload the code.
-
We'd also recommend using a couple of alligator clips (or conductive Maker Tape) to hook up the Piezo Speaker to pin 10 for a quick test. If you run your fingers along the pinout holes on the board the Piezo Speaker should make sound effects.
-
Note: You can change the pitch of the individual notes in the code. We set things up so that we could easily play the song Funky Town on our Piano Tie.
-
-
-
Maker Tape is our special conductive tape. It's made of nylon and conductive on top and bottom. It's more like a fabric ribbon than your traditional foil conductive tape. It's ideal for this project because it can bend, twist, and fold without breaking. Seriously, don't use copper foil for this project. (Or anything. Ever.)
-
Note: You may or may not want to use some double sided tape to secure down your Invention Board. We did it at this step, you may wish to do it after this step.
-
We're now going to lay down lines of tape from our Invention Board to the front side of our tie.
-
Thread a line of 1/8th inch Maker Tape through Pin 15 (or whatever pin you're using) on the Invention board. Fold it back onto itself a bit to secure it in place. Make sure it's ONLY touching the copper circuit around Pin 15.
-
Without cutting it, make your way down the backside of your tie and then around to the front of the tie. You'll want to go past the black keys on the design out to the open middle area.
-
Do this for each of the keys you want to use. Keep in mind only pins 15, 16, 17, 18, 19, 22, 23, 0, 1, 3, and 4 are set up to play notes as they're the only Capacitive Touch inputs on the board.
-
-
-
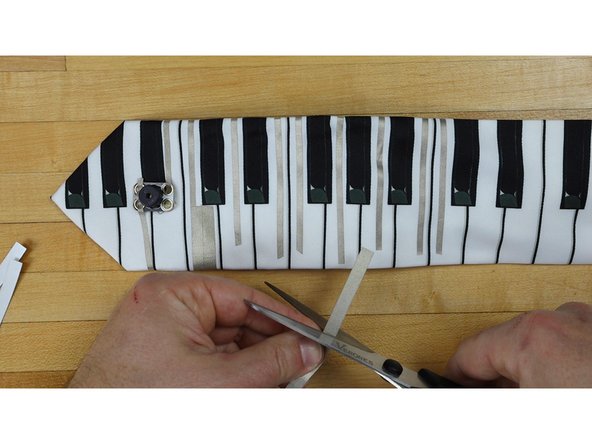
In order to create a larger Touch Point for us to activate we're going to overlap on 1/4th inch Maker Tape at the ends of our 1/8th inch tape lines.
-
Use two short pieces of 1/4th inch Maker Tape, making sure that each piece slightly overlaps the others.
-
Do this to the end of each piece of 1/8th inch.
-
-
-
You have three options on what to do with your Piezo Speaker.
-
Easy: Put it on the backside of your tie, but no one will ever hear it.
-
Almost as Easy: Put it on the front and run tape around to it.
-
Difficult and not Necessary: Cut a hole in your tie so the Piezo Speaker element sticks through.
-
What We Did: Since the Piezo Speaker is black and white we positioned on the front in such a way that it blends in. We then ran Maker Tape from pin 10 to the Piezo Speaker and then back to Ground.
-
Tip: Use some double sided tape to hold down the piezo speaker, then just run the Maker Tape over the top of the conductive pads on each side.
-
-
-
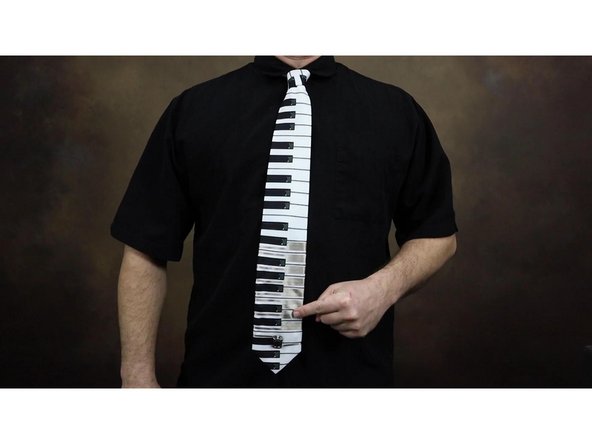
When wearing the tie we opted to use a long USB cable that ran up the backside of the tie and then down through our shirt. The Power Bank was then hidden in a pocket for easy access. You could also easily put a small Power Bank in a shirt pocket.
-
The ONLY issue you may run into with some Power Banks are their auto cut off feature. Since our Arduino doesn't use much power, especially when not actively being played, some Power Banks may shut off since they're assuming nothing is plugged into them.
-
If your Power Bank shuts off, either find a different Power Bank or wire in an LED to the project to draw a bit more power and keep it from shutting off.
-
This same project could also easily be applied to a large piece of white cardboard in the shape of a keytar. Wearing both the tie and playing the DIY keytar would also make for an epic solo. We recommend finding several small colored lights that you can set on the floor in front of you for maximum rocking.
-
-
-
If you're gonna wear a piano around your neck (in the form of a tie, or otherwise) commit to it! Rock out like no one has ever rocked out with a piano tie before!
-
If you find that your neck isn't doing the best you can also wear the tie around your head while doing a wicked air guitar solo. This may attract the wanted or unwanted attention of other rockers in the area. Only attempt in public if you've spent hours practicing in front of a mirror.
-