
Introduction
With a distance sensor and a servo motor we detect when someone enters a room and pop up a ghost to scare them!
Video Overview
Featured Document
-
-
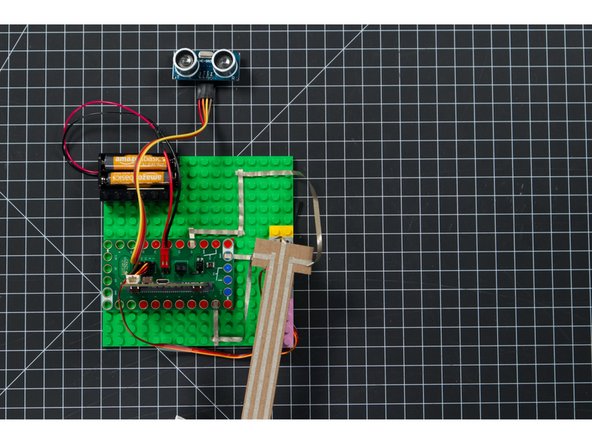
Start by connecting the servo, distance sensor, and battery pack to the Bit Board. The servo and battery pack have connectors that are compatible with the pins on the Bit Board, and for the distance sensor you'll need to use female jumper wires.
-
We don't need to add the micro:bit yet. We'll add it after we add our code in Step 4.
-
-
-
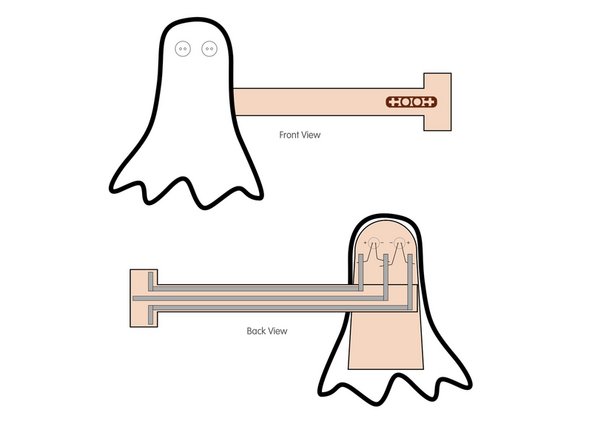
Print the PDF page with the ghost template. The ghost will just be the paper that you cut out, and the two other pieces should be cut from cardboard.
-
You can use the paper template glued or taped to a piece of cardboard as a cutting guide. It doesn't have to be exact, but getting it pretty close will make things easier.
-
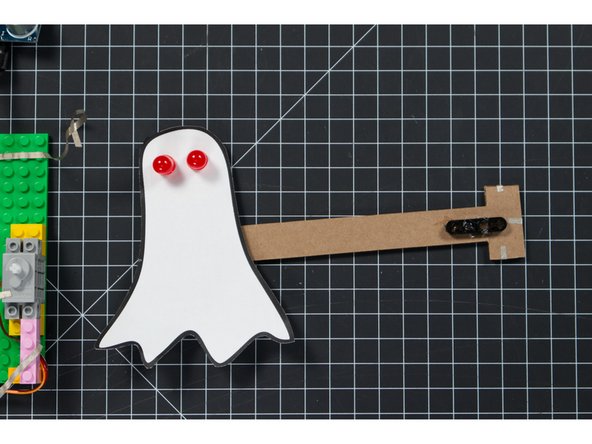
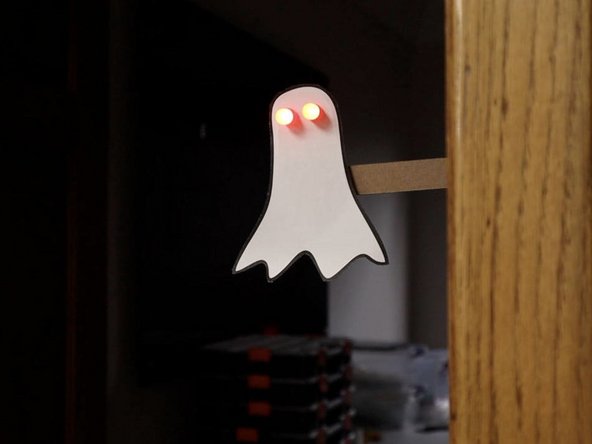
If you do not want to add blinking LED eyes you can just color in the eyes of your paper ghost. If you do want blinking LED eyes we'll do that in Step 3.
-
-
-
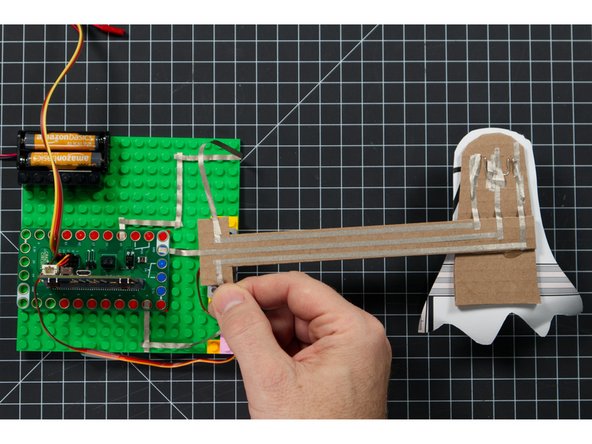
Glue your paper ghost onto the ghost backing piece of cardboard, and then attach the arm to that.
-
If you want to add LEDs for the eyes, use a safety pin to poke two holes for each eye so you can put the LED legs through the paper and the cardboard. Once you have the holes, put the LED legs through with the shorter leg (ground) on each LED towards the center.
-
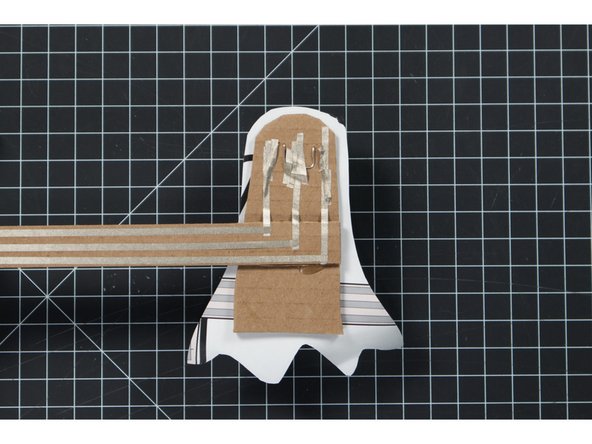
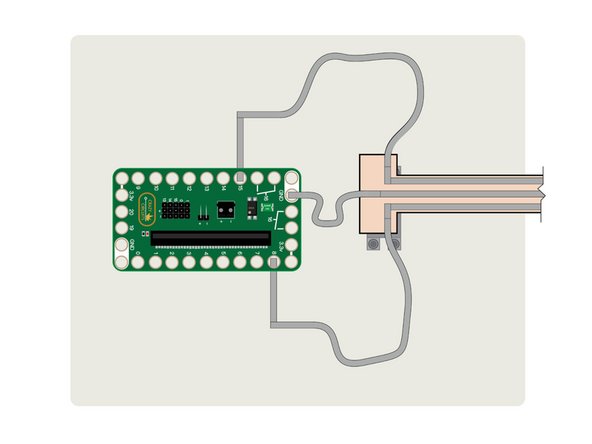
For the shorter (negative) legs we’ll run one piece of 1/8” Maker Tape over them and then run pieces down to the end of the arm.
-
We’ll then do the same for the two longer (positive) legs of each LED. Run tape for each of the legs down to the end of the arm as shown.
-
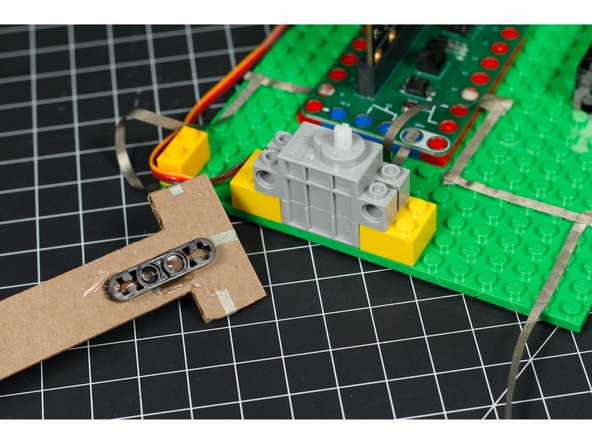
Use hot glue to attach the LEGO Beam to the end of the arm. The LEGO Beam will go onto to the servo shaft when we attach the arm.
-
-
-
Connect a USB cable to the micro:bit and then plug it into your computer.
-
We'll be using makecode.microbit.org to program our board. It uses a simple drag and drop block interface.
-
We're going to load the following code for our Surprise Ghost program: https://makecode.microbit.org/_Hb0503Jjo...
-
You can change the code to affect how the ghost reacts. Maybe you want to change how close someone has to get to trigger the distance sensor, or how long the ghost stays up before going down again.
-
Once the code is loaded you can disconnect the USB cable and insert the micro:bit into the Bit Board so it is ready for testing.
-
-
-
Before you attach the arm you should test your code to make sure the distance sensor works and that the servo moves properly.
-
You should be able to see the servo shaft move from one position to another when the distance sensor is triggered. If it does not, double check that you have everything plugged in correctly.
-
Once you are satisfied things are working properly, attach the arm to the servo so you can test the movement.
-
-
-
Plug in your battery pack so your circuit gets power.
-
With the arm attached do a bit of testing to make sure that it moves from the down position to the up position when the sensor is triggered.
-
If your ghost has LED eyes you'll need to add Maker Tape to control them in Step 7, otherwise you can skip to Step 8.
-
-
-
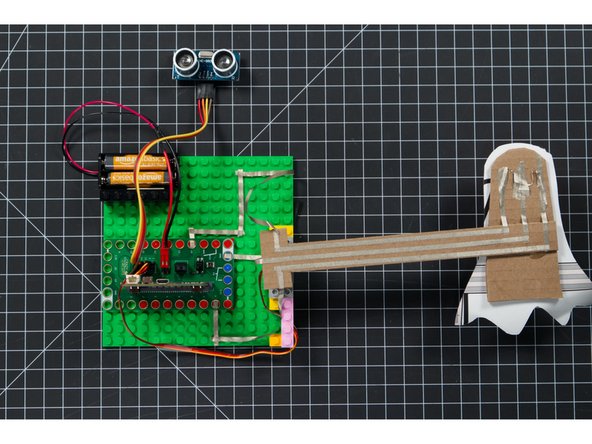
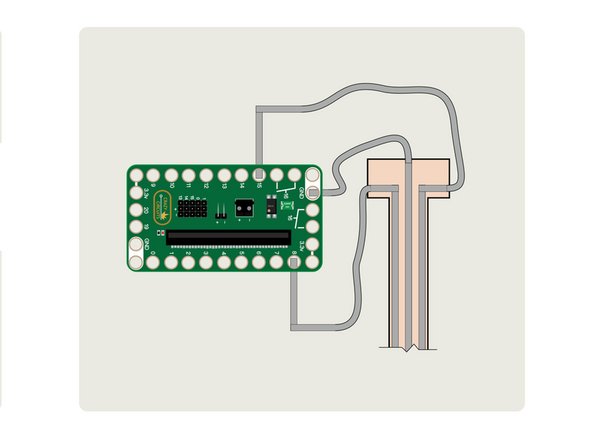
Add Maker Tape to Pins 8, 15, and Ground on the Bit Board, sticking it down to your LEGO baseplate, and then attaching it to the arm with enough slack so the arm can move freely.
-
There are two things to keep in mind when adding these connections. You’ll want to make sure your tape has enough slack to not pull loose, but also make sure your tape doesn’t short out your circuit by touching another piece of tape or your Bit Board or micro:bit
-
It may take a few attempts to get the length just right and stick down the tape to a position where it can move freely and not short the connection.
-
-
-
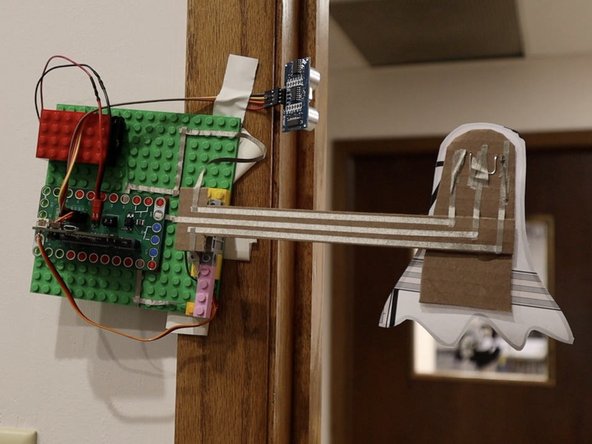
With everything assembled you should be ready to scare someone!
-
We attached our ghost mechanism to a wooden door frame with some low-tack tape.
-
Once your ghost is in place just wait for a "victim" to arrive and get ready to laugh when they get scared by your ghost!
-
-
-
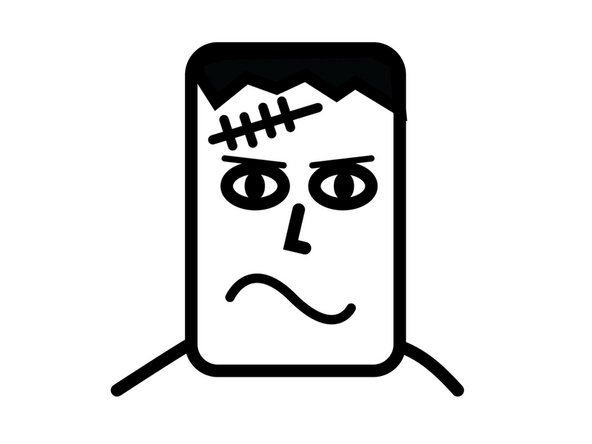
If you find ghosts too scary (or you just don't like ghosts) you can always opt for something else to pop up and surprise someone. Maybe a werewolf, or Frankenstein's Monster, or Dr. Frankenstein, or a goat. Whatever you can dream of and put on paper could work.
-
You also don't have to limit it to Halloween-related topics. Maybe you want a reindeer or elf that pops up, or Santa himself. The choice is yours!
-


Cancel: I did not complete this guide.
One other person completed this guide.
Attached Documents
