
Introduction
The micro:bit has a built in accelerometer which we can use with a Bit Board, a LEGO baseplate, and a few LEDs to create a simple electronic level.
Video Overview
Featured Document
-
-
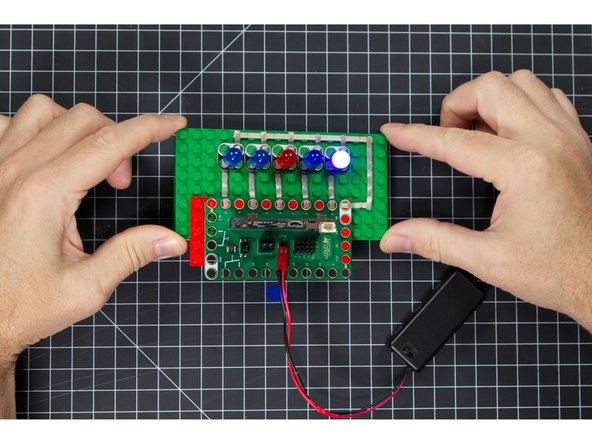
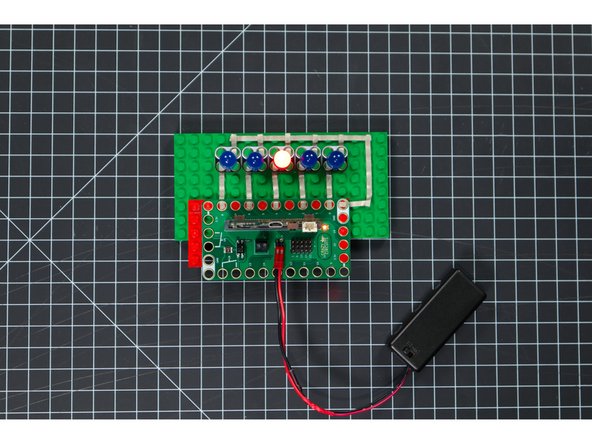
Build your circuit on a LEGO baseplate using the Crazy Circuits Bit Board, Maker Tape and 5 LEDs.
-
You can use as few as 3 LEDs or use more than 5 if you like.
-
We used a few 1 x 4 LEGO plates so our Bit Board would fit level on the baseplate and not hang off the back.
-
-
-
Insert the micro:bit into the Bit Board and connect a USB cable that is plugged into your computer.
-
We'll be using makecode.microbit.org to program our board. It uses a simple drag and drop block interface. We'll also provide all the example code you need.
-
We're going to load the following code for our Simple Level program: https://makecode.microbit.org/_asufxbbTz...
-
Once the code is loaded and running you should be able to tilt the board left or right while it is powered by the USB cable and it should work.
-
-
-
You can power your level by using a 2 AAA battery pack plugged into the Bit Board or by plugging a USB cable into the micro:bit
-
Try picking up the level and tilting left, and then right, and then trying to keep it level. If you get it level the center LED should light up.
-
-
-
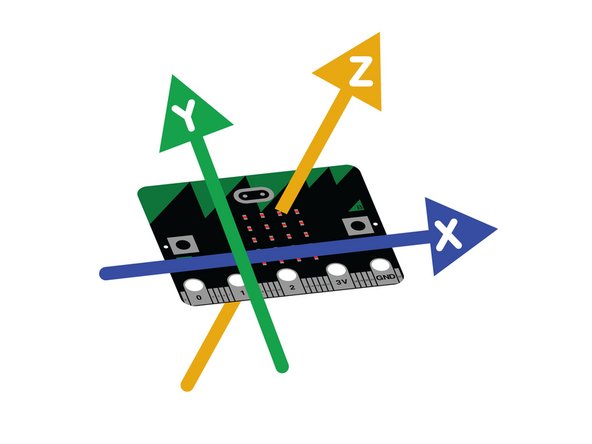
The micro:bit measures movement along three axes: X - tilting from left to right. Y - tilting forwards and backwards. Z - moving up and down.
-
An accelerometer measures "proper acceleration" which is physical acceleration (the rate of change of velocity) of a body in its own instantaneous rest frame. This is different from coordinate acceleration, which is acceleration within a fixed coordinate system.
-
While our simple level can show us the tilt or angle of a surface, sliding it back and forth rapidly can also measure the physical acceleration (velocity) of the device.
-
-
-
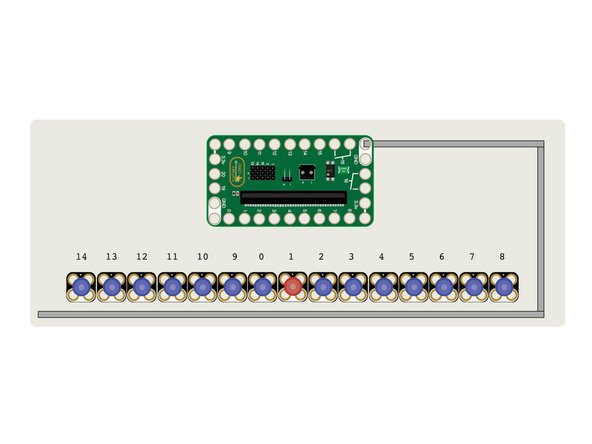
While our Simple Level uses 5 LEDs you could easily add more. How about 15 LEDs? Can you figure out how to arrange your Maker Tape so you don't overlap any of it when designing a larger circuit?
-
The diagram shows where each LED should be routed to on the Bit Board with a suggestion of how Ground might connect to each LED.
-
If you build a larger level you'll want to adjust the code to deal with it. Can you break the range from -1000 to 1000 equal amounts based on how many LEDs you have?
-


Cancel: I did not complete this guide.
One other person completed this guide.
Attached Documents
