
Introduction
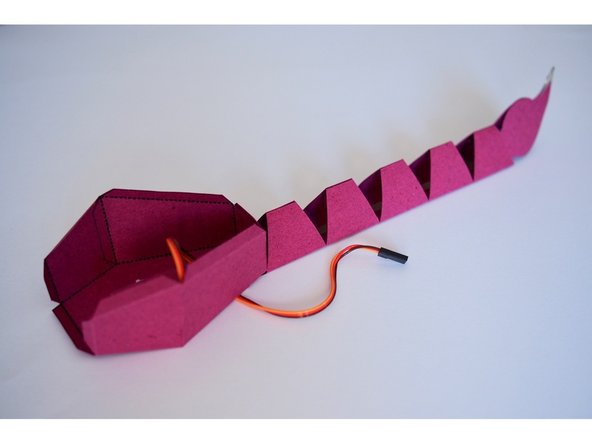
Make an angry scorpion that stings if you touch it!
Video Overview
Featured Document
-
-
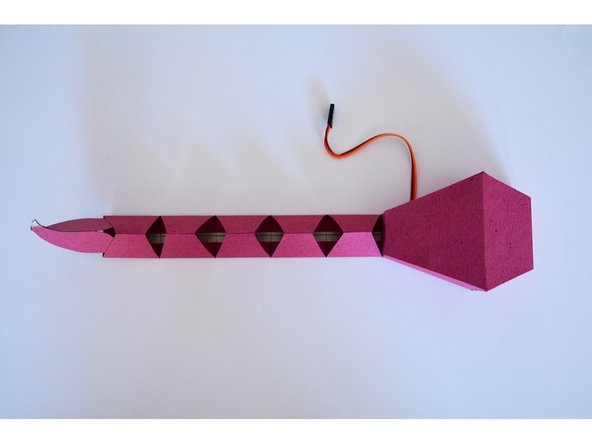
Print the template.
-
Cut the parts out. You may find it easiest to use a craft knife or small scissors for the cutouts.
-
Make sure the scale is at 100% when you print the template.
-
-
-
Prefold the creases on the body — this will make it easier to put together later on.
-
-
-
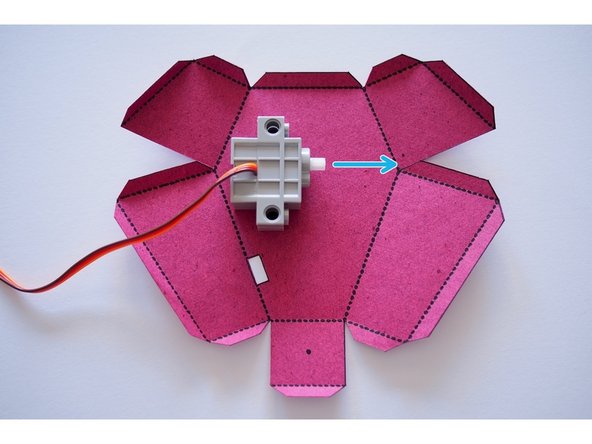
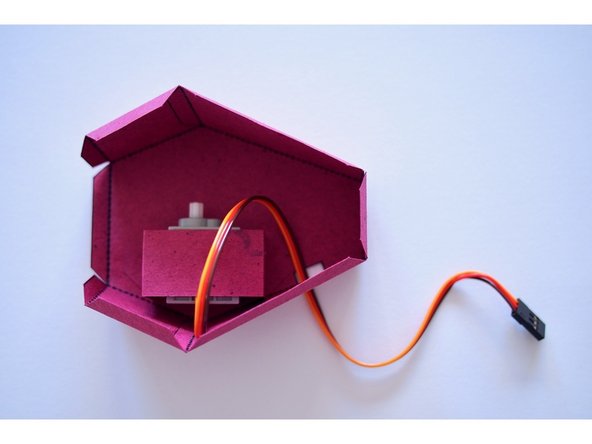
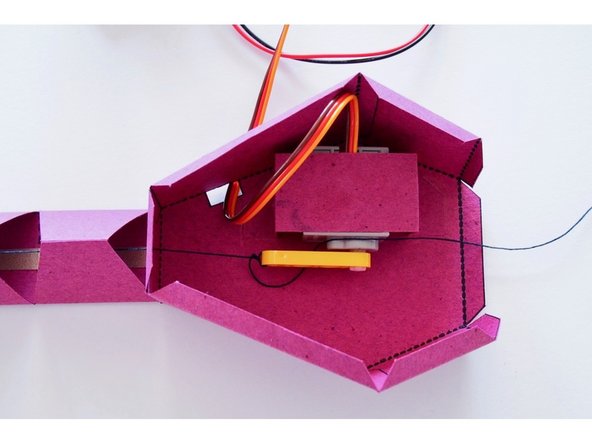
Position the servo on the body.
-
You want the servo axle to be roughly aligned with the corner of the body as shown.
-
You can also use the markings on the template to position the servo.
-
-
-
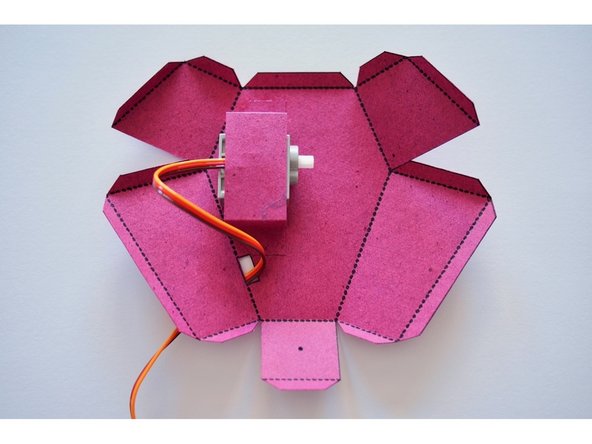
Fold the servo holder.
-
Glue the servo holder so it holds the servo in position.
-
You only need to put glue on the tabs where the holder attaches to the body, not on the servo itself.
-
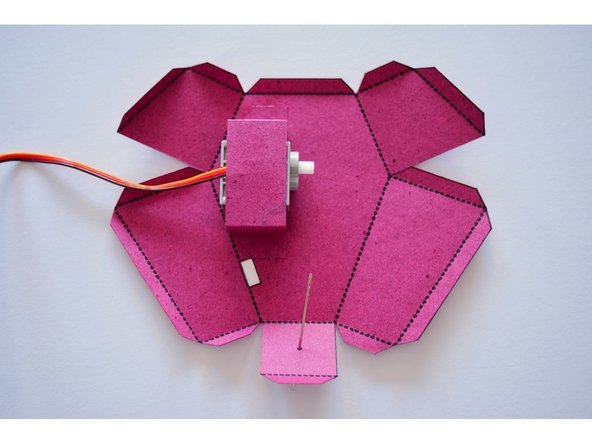
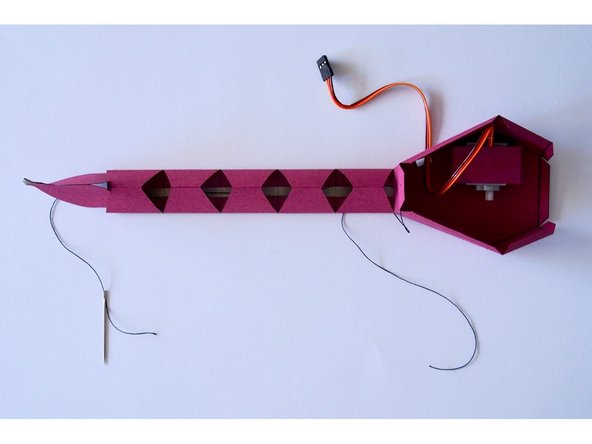
Thread the servo cable through the cutout in the body.
-
-
-
Use a needle to poke a hole through the dot marked on the template.
-
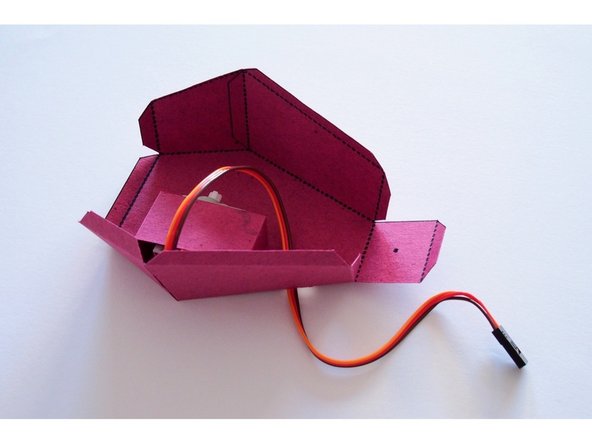
Fold and glue the sides of the body.
-
-
-
Fold and glue the back tab of the body.
-
-
-
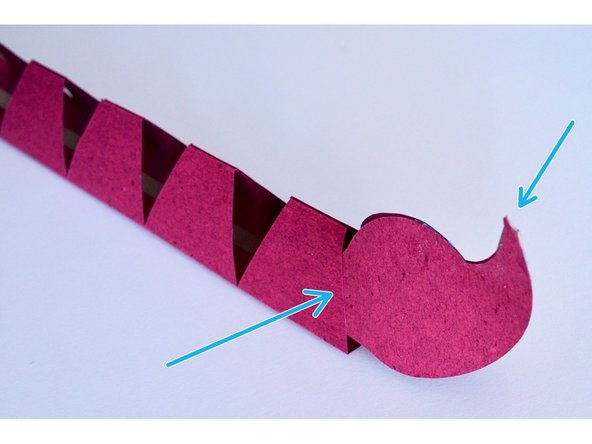
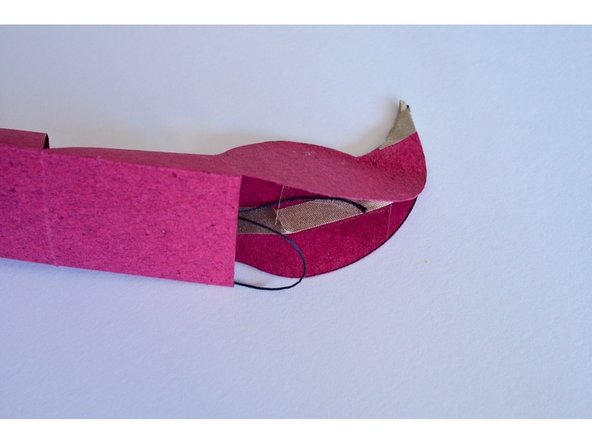
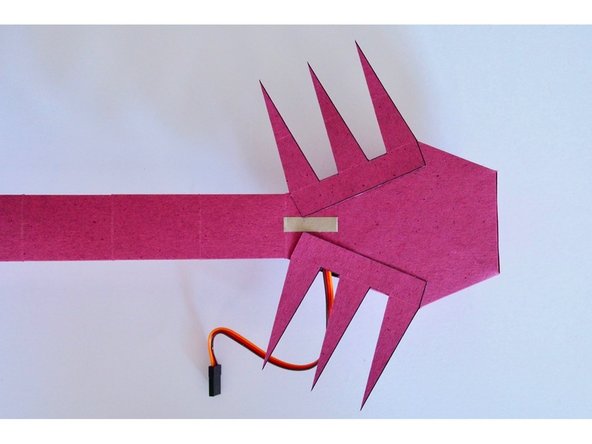
Glue one side of the stinger onto the tail as shown.
-
Make sure you're gluing to the end of the tail without the tab.
-
-
-
Cut a piece of Maker Tape that's a few inches longer than the tail.
-
Attach the Maker Tip to the tip of the stinger.
-
Wrap the tape around so only a tiny bit is visible on the outside (the side without the template markings), and the rest of it is on the inside of the tail.
-
I used 1/4" wide Maker Tape for the tail, but 1/8" should work fine as well, and will be necessary later on.
-
-
-
Tape the rest of the Maker Tape along the length of the tail as shown.
-
At the very end, fold over about an inch of tape so it overlaps onto the tab on the front side of the tail.
-
-
-
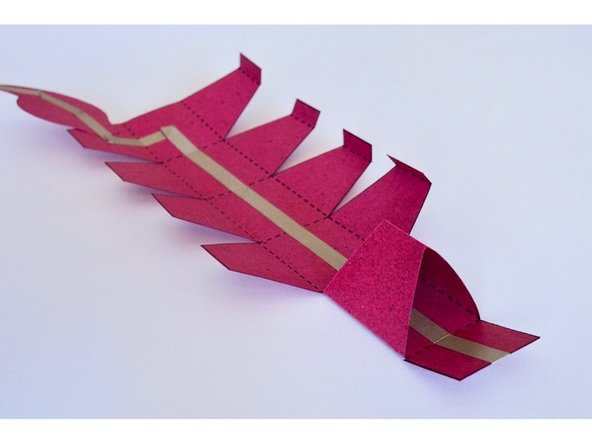
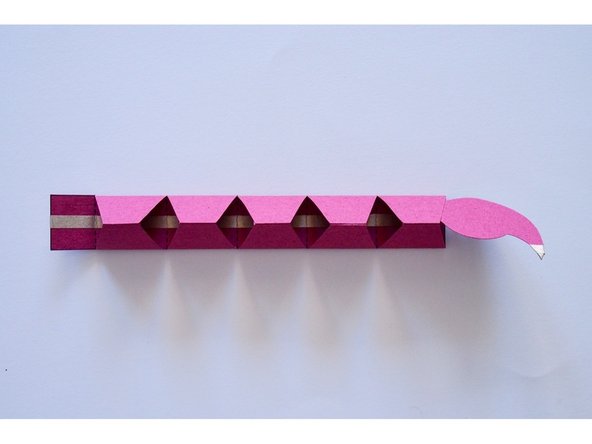
Prefold the creases on the tail.
-
Fold and glue the first section of the tail to make a triangular shape as shown.
-
-
-
Fold and glue the rest of the tail sections.
-
-
-
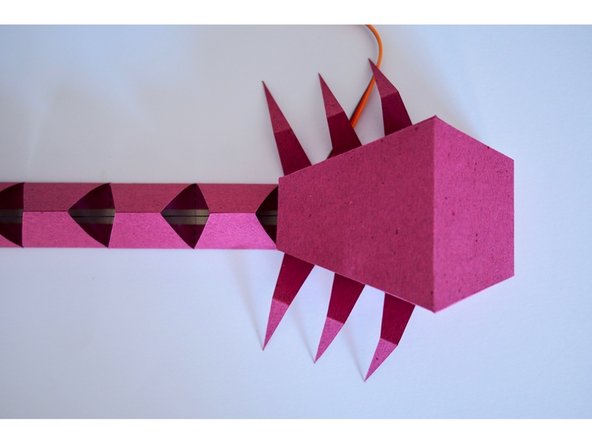
Glue the other half of the stinger on. The two pieces won't glue flat, so you only need to put glue where marked in the picture.
-
You can also add a bit more Maker Tape to the stinger to make both sides of it conductive.
-
-
-
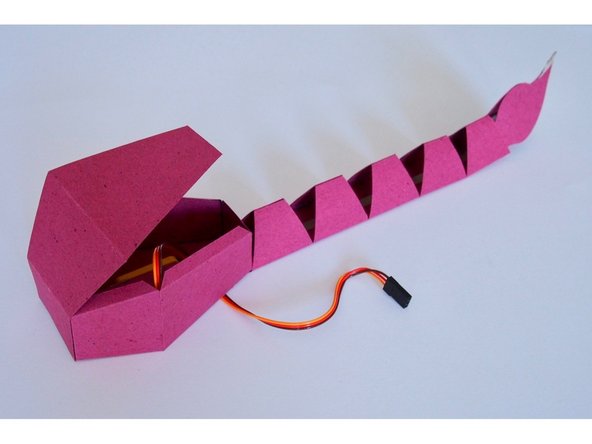
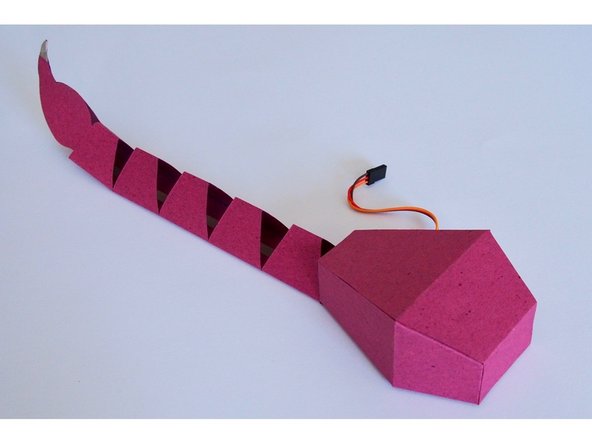
Glue the tab on the tail to the bottom of the body to attach it.
-
-
-
Cut a piece of string a bit longer than the tail, and thread it all the way through.
-
Tape one end of the string to the inside of the stinger.
-
-
-
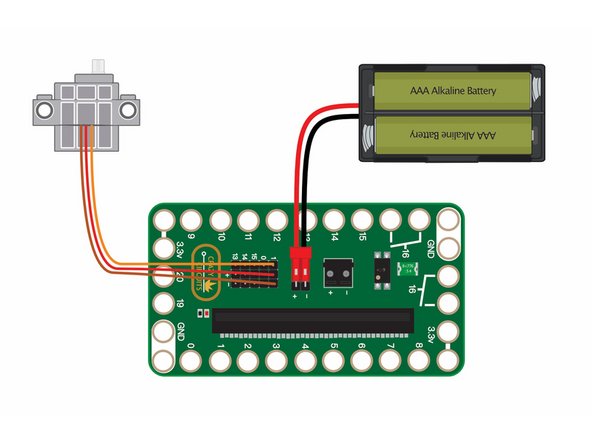
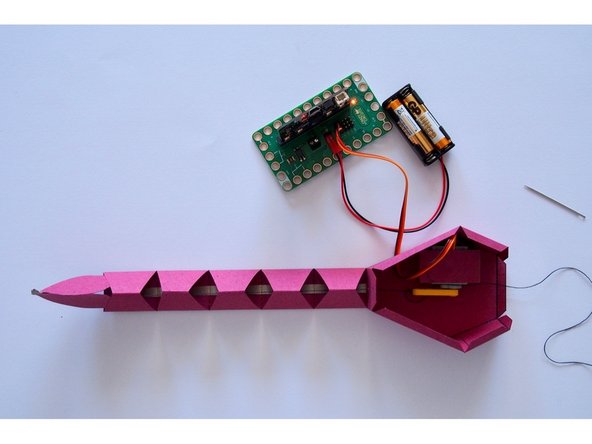
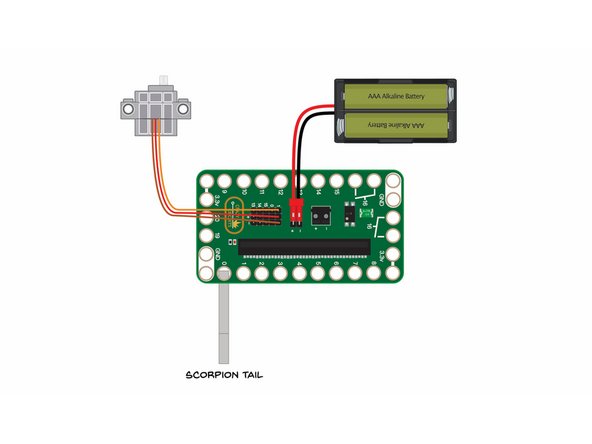
Attach the servo to the Bit Board as shown.
-
The orange wire should be closest to the Pin 1 label on the board.
-
-
-
Upload the Code from here: ScorpioBot
-
Connect a USB cable to the micro:bit and then plug it into your computer.
-
We'll be using makecode.microbit.org to program our board. It uses a simple drag and drop block interface.
-
We're going to load the following code for our ScorpioBot program: https://makecode.microbit.org/_TvFipiLuH...
-
-
-
Push the buttons to test that the servo works.
-
Once you know which direction the axle on the servo is oriented, attach the LEGO axle mount. (You want it oriented so it moves the way shown in the video).
-
-
-
Tie the string to the end of the LEGO Beam in such a way that it is lightly tensioned when the mount faces towards the tail, and tight enough to pull the tail up when the beam points away from the tail.
-
-
-
Test that the tail pulls up. If it doesn't pull up all the way, you may need to tie the string tighter or shorten it a bit.
-
-
-
Glue the back on to ScorpioBot, sealing the body up.
-
-
-
Glue the legs to the bottom of ScorpioBot's body.
-
-
-
Fold the legs to make them more insect-like.
-
-
-
Cut two short pieces of pipe cleaner.
-
Fold the ends of the pipe cleaner over (this is so the tape has more of a grip area and keeps the pipe cleaner from turning).
-
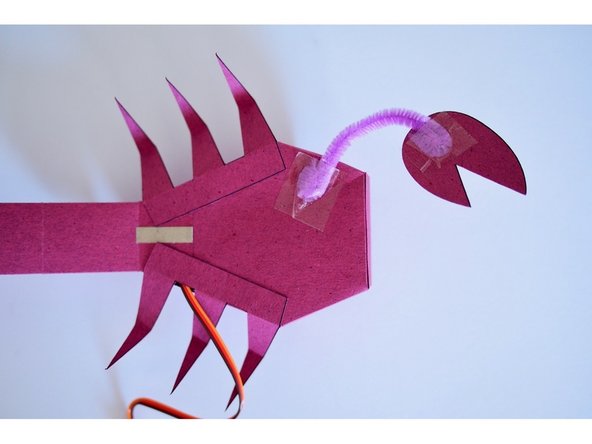
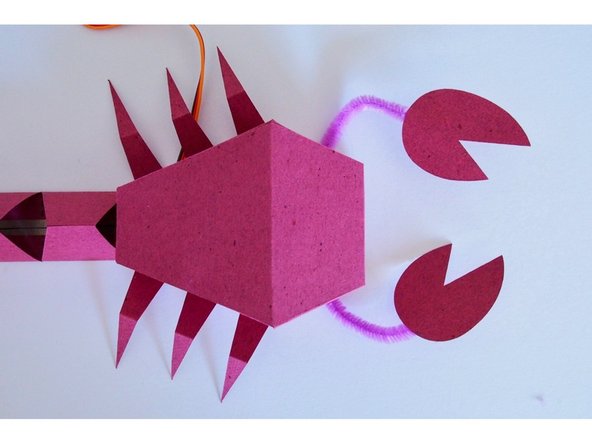
Tape one end of the pipe cleaner to the claw, and the other end to the bottom of the body.
-
Do the same with the other claw.
-
-
-
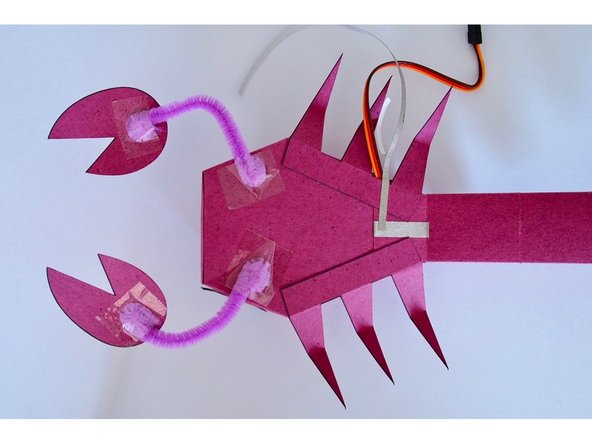
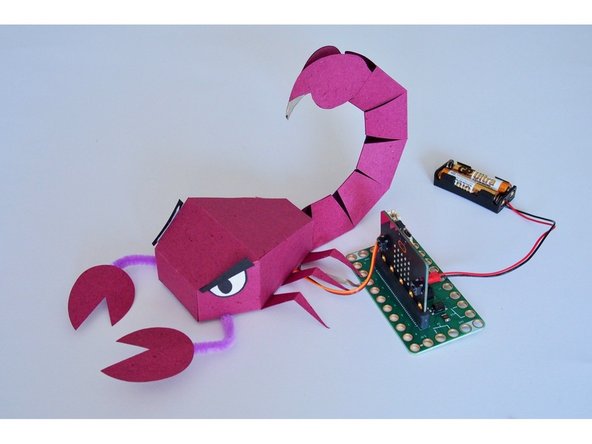
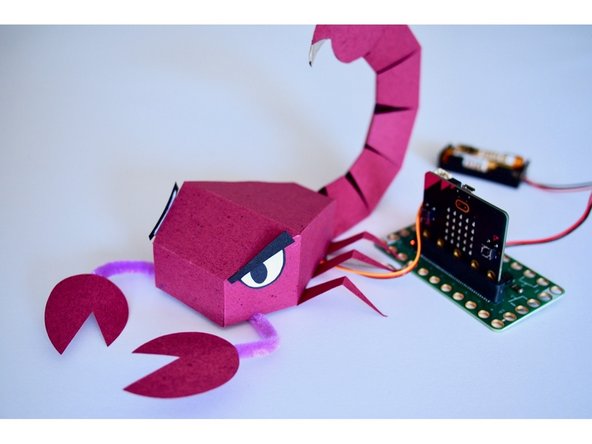
Give ScorpioBot a face!
-
Expressive eyes can help convey emotions!
-
-
-
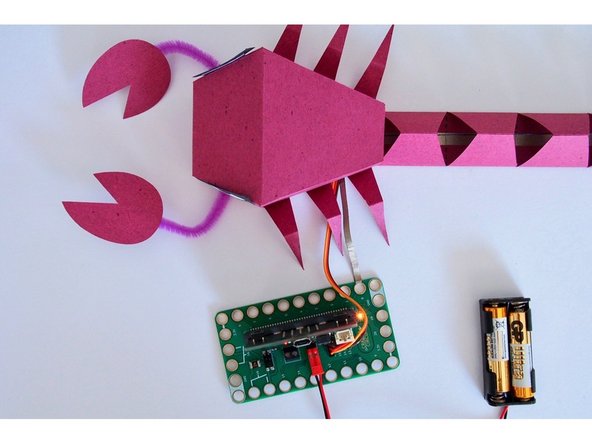
Connect the Maker Tape on the bottom of ScorpioBot to Pin 0 on the Bit Board with a piece of 1/8" wide Maker Tape.
-
We looped the Maker Tape around the holes in the Bit Board, like in Step 4 of this project.
-
You can use a LEGO baseplate instead of looping the Maker Tape.
-
-
-
Touch the GND pin on the Bit Board then touch ScorpioBot's stinger!
-
I initially tried this with capacitive sensing (which doesn't require touching the GND pin), but found that the piece of Maker Tape I used was so long, that the capacitance of the tape itself affected the touch sensor!
-


Attached Documents
