
Introduction
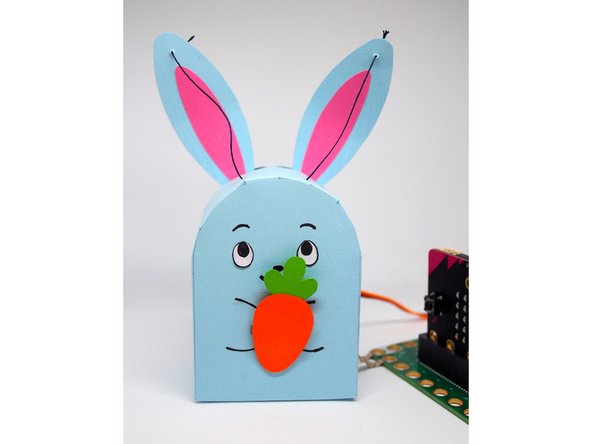
Build this fun paper craft rabbit that reacts when you give it a carrot. With our Bit Board and Maker Tape it's easy to build! Great for Easter!
Video Overview
Featured Document
-
-
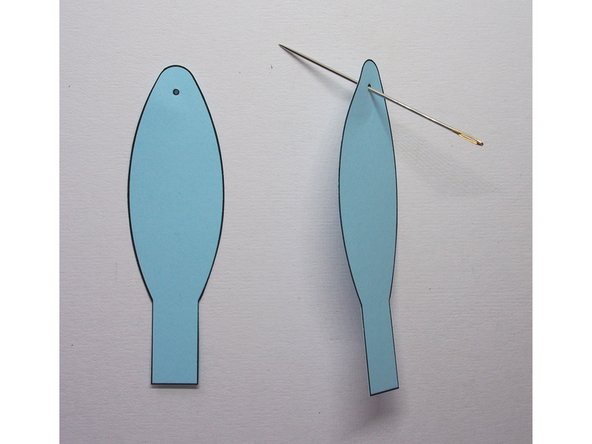
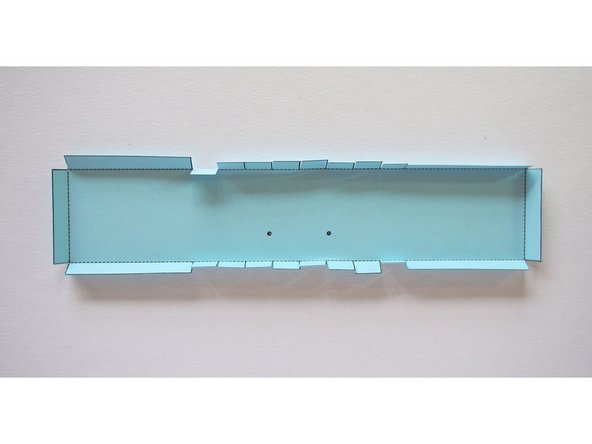
Print and cut out the template
-
-
-
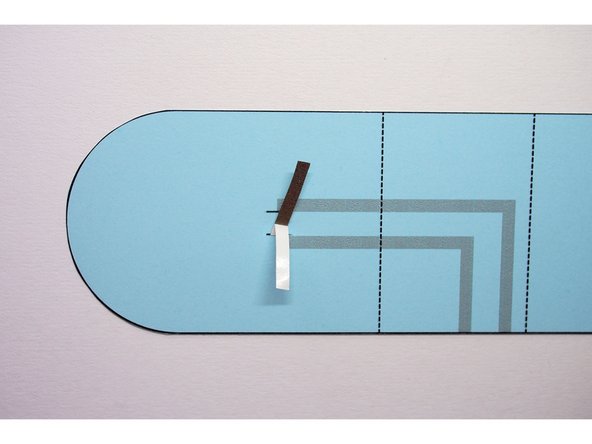
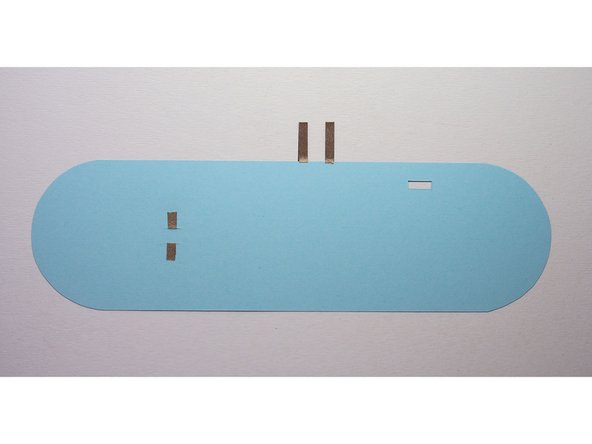
Cut two small pieces of Maker Tape, about 1" long each
-
Without removing the backing, slide a piece of the Maker Tape through the slit in the body, so just a short bit is poking out the side without the template
-
I'll refer to the side of the body with the template as the "inside" (since it'll be inside the Rabbot when it's folded up)
-
-
-
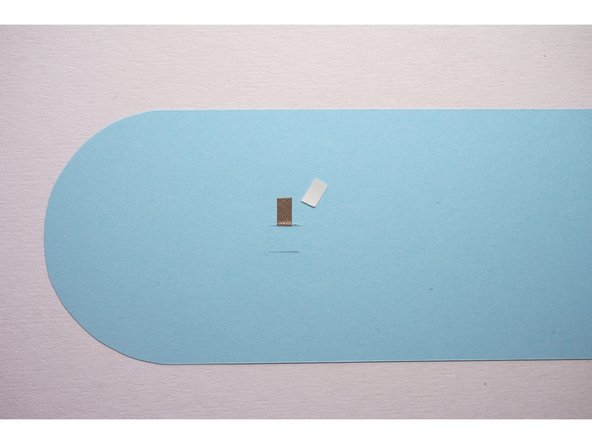
Peel off the backing, but only for the piece of Maker Tape sticking out on the inside
-
Trim off that piece of backing
-
Stick down the piece of tape
-
-
-
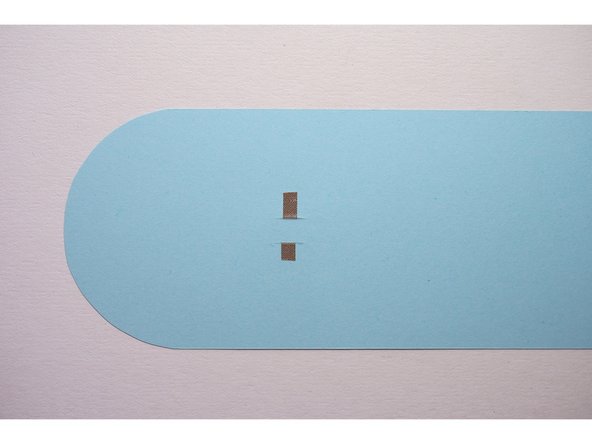
Remove the rest of the backing on the Maker Tape
-
Stick down the tape on the side of the body without the template (the outside)
-
This is the side that will be visible when everything is folded up
-
Tip: You can trim the Maker Tape before removing the backing if you don't want very much showing on the outside
-
-
-
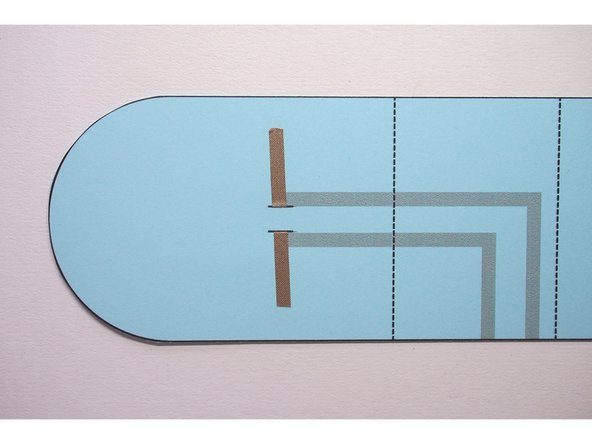
Repeat with the other slit so there are two pieces of Maker Tape
-
-
-
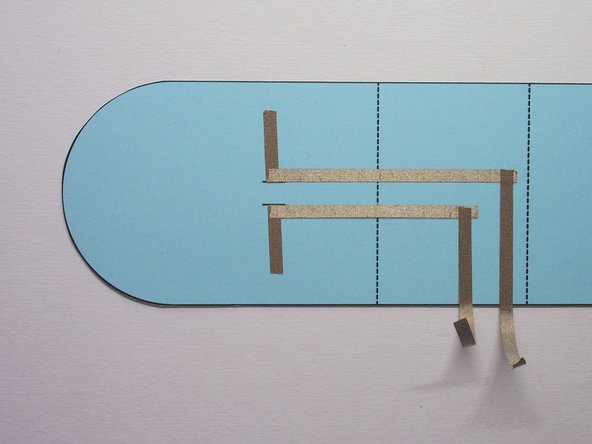
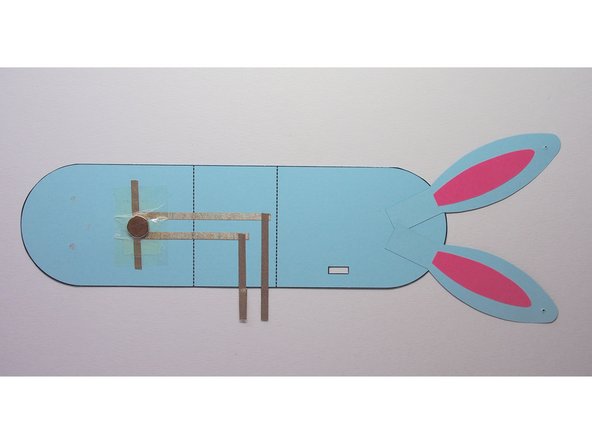
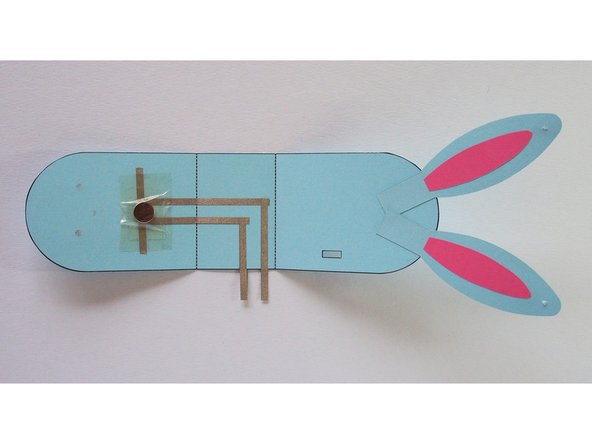
Add more Maker Tape following the paths on the template
-
Leave some extra hanging off the side of the body
-
Fold the extra on itself to create two small tabs
-
-
-
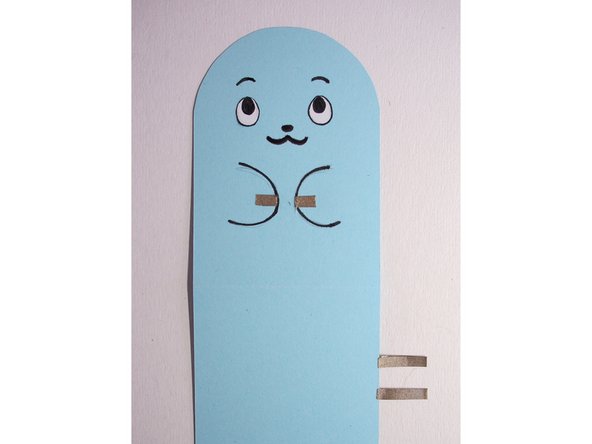
Give your rabbot a face!
-
Make sure you're drawing on the outside of the body, and on the half where the slits with the Maker Tape are
-
Draw paws around the Maker Tape
-
You can also decorate at the end, but I found it was easier to draw while everything was still flat
-
-
-
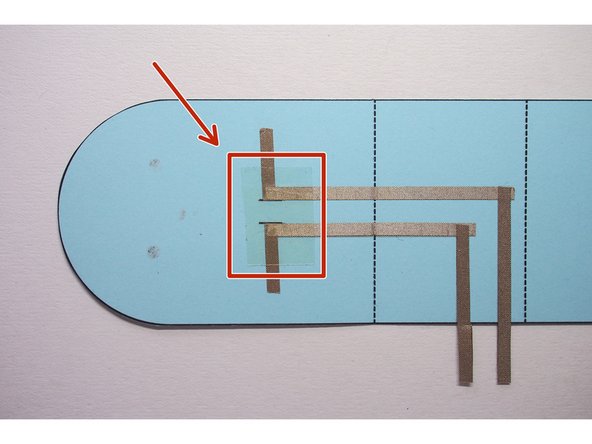
On the inside, add a piece of regular tape over the slits, making sure it covers the Maker Tape
-
Make sure the tape is bigger than the magnet! The tape is there to insulate the magnet from the Maker Tape — otherwise the magnet itself closes the electrical circuit!
-
Tape the magnet on, right in between the slits
-
-
-
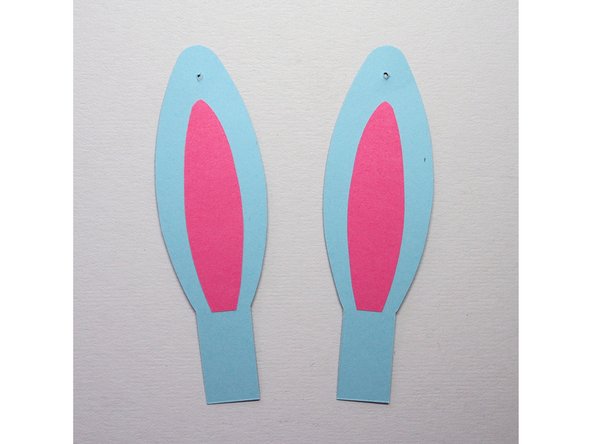
Use a needle to poke holes in the ears where indicated on the template
-
If you want to add any decoration to the ears, it's easiest to do now rather than at the end
-
-
-
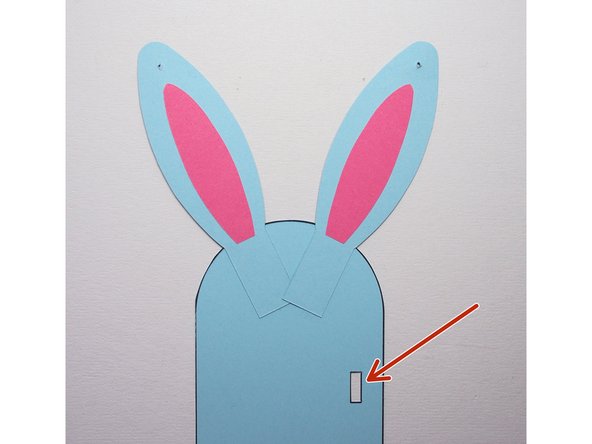
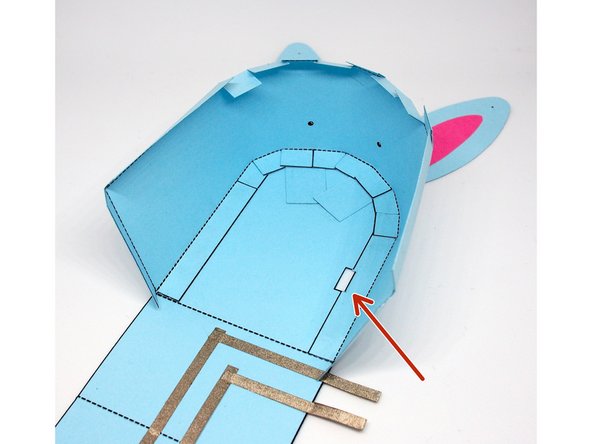
Glue the ears to the body
-
Make sure that you're attaching them to the inside, and on the half of the body where the rectangular cutout is (there should be an arrow on the template that will get partially covered)
-
-
-
Crease along the dashed lines in the template — this will make it easier to fold the Rabbot up later
-
-
-
Use the sewing needle to poke holes in the paper where indicated on the template
-
Fold all the tabs up where indicated on the template
-
-
-
Glue the side so the tabs are on the inside of the body; they'll overlap on top of the ears
-
Make sure you're gluing it with the arrows on the side and body pointing towards each other (not shown in photo because I made the mistake of gluing this wrong! I had to poke new holes for the thread)
-
-
-
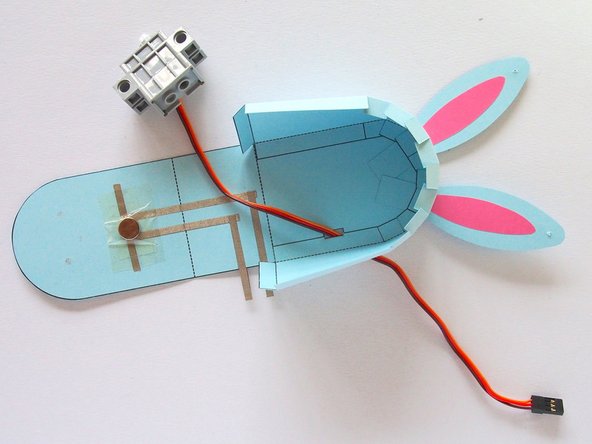
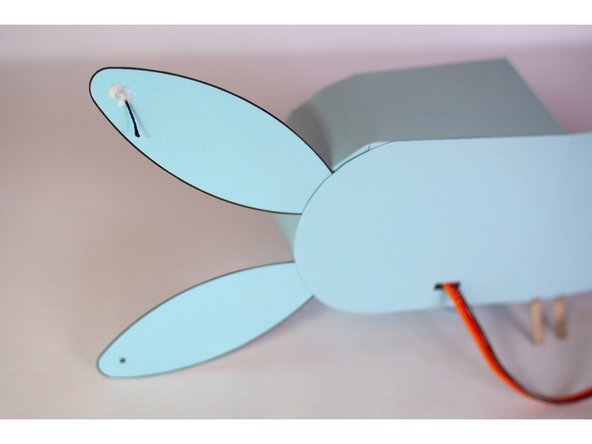
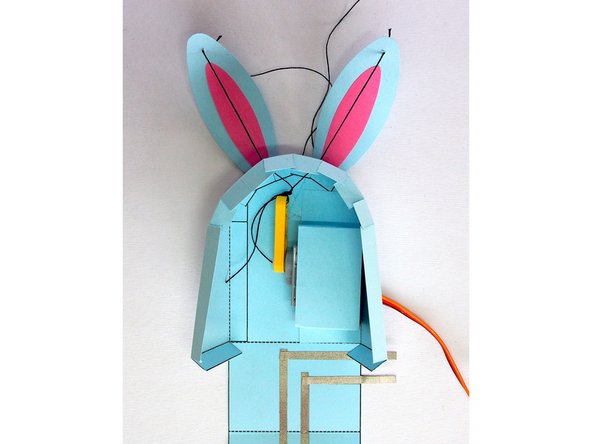
Thread the servo wire through the rectangular cutout in the body
-
Move the servo so the back is flush with the side of the body
-
-
-
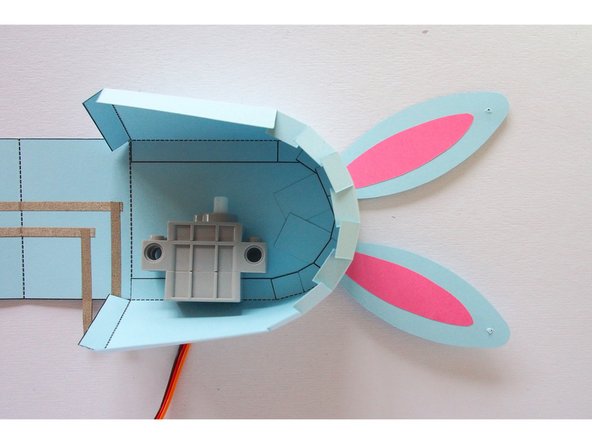
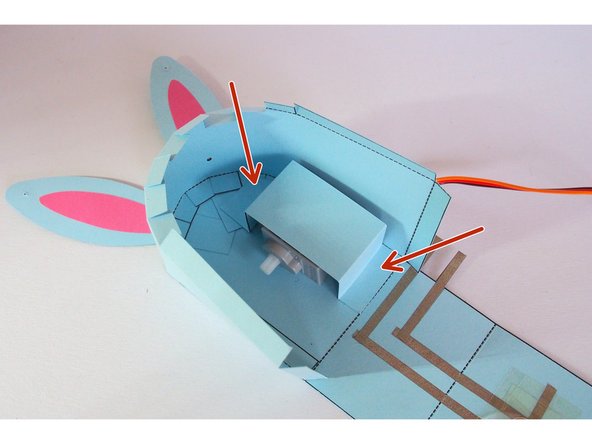
Fold the servo holder
-
Glue the servo holder around the servo
-
The part with the diagonal cut out should face the curved part of the body
-
You don't need to put any glue on the servo itself; the tabs on the servo holder should glue directly to the body
-
-
-
Cut two pieces of thread about 12" each
-
Knot one end of the thread (like you're sewing)
-
-
-
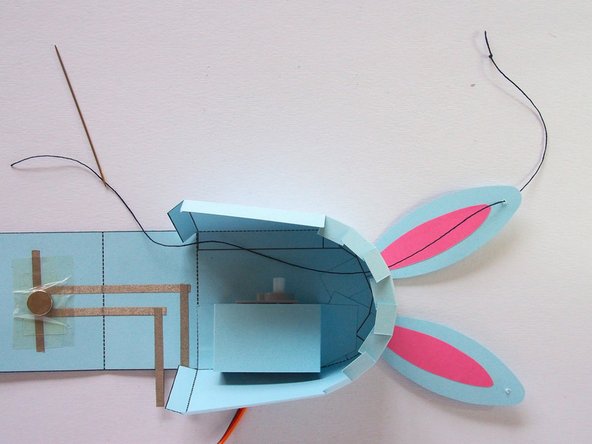
Using the sewing needle, sew a piece of thread through the hole in the ear and then the hole in the body
-
Add a drop of glue on the back of the ear so the knot doesn't pull through the paper
-
Do the same thing with the other ear
-
-
-
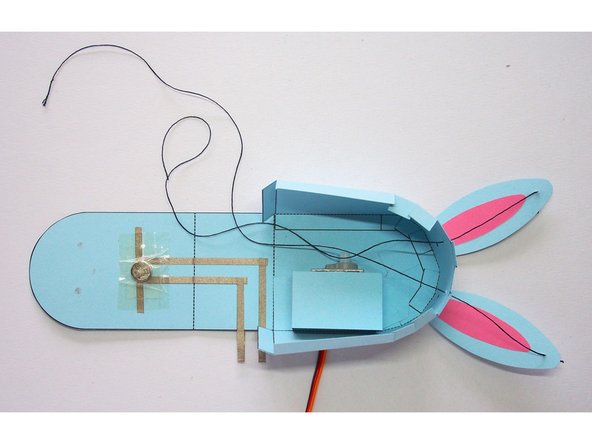
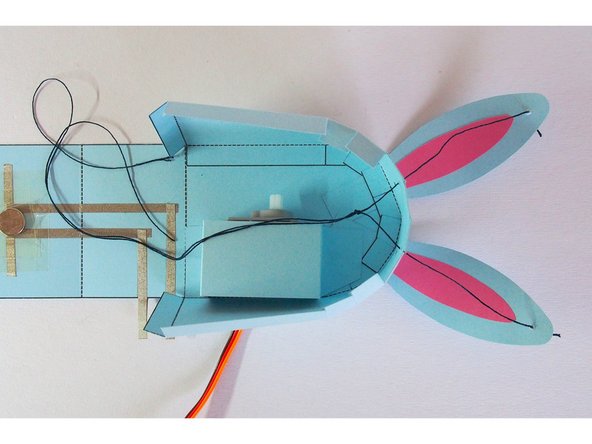
Tie the two strings together just above the servo
-
-
-
Tie the two pieces of thread to the LEGO axle mount
-
You want to tie it so that when the LEGO axle mount points up, the thread is loose enough for the ears to be fully extended, but when it points down, the thread is tight enough to pull the ears down
-
Attach the LEGO axle mount to the servo
-
-
-
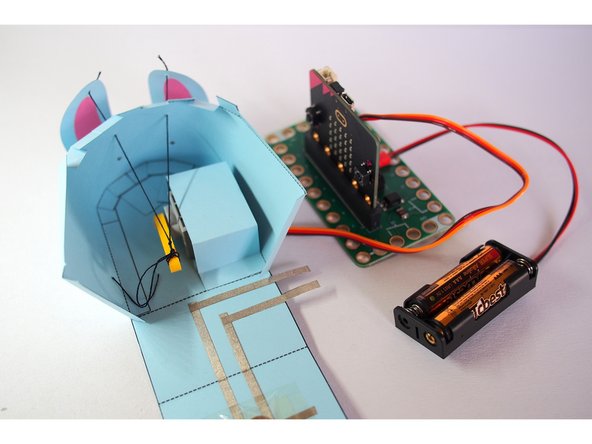
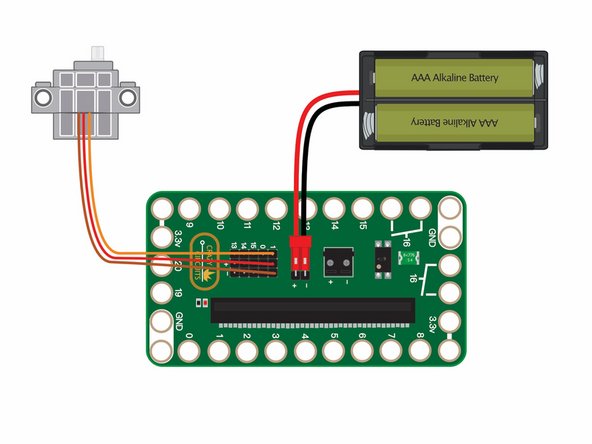
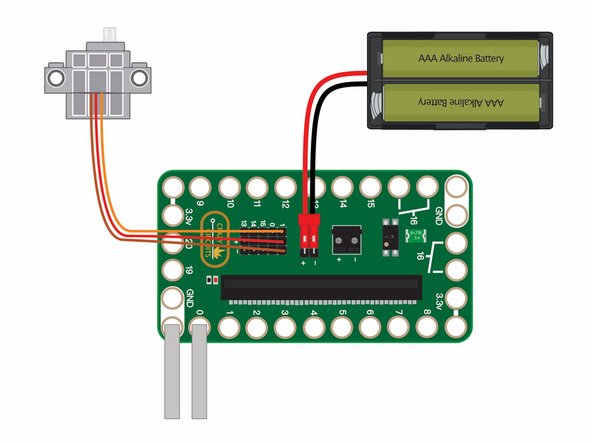
Connect your servo and battery holder to the Bit Board on Pin 1
-
-
-
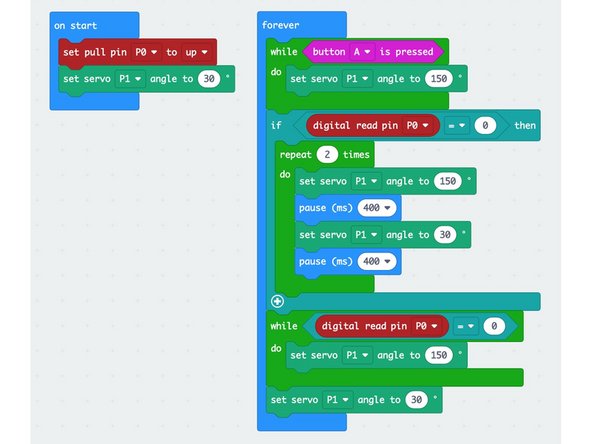
Upload the code from here: Rabbot Code
-
-
-
Test that the mechanism works as expected
-
When the Bit Board turns on, the servo should pull the ears down; pressing and holding the A button should raise them up again
-
-
-
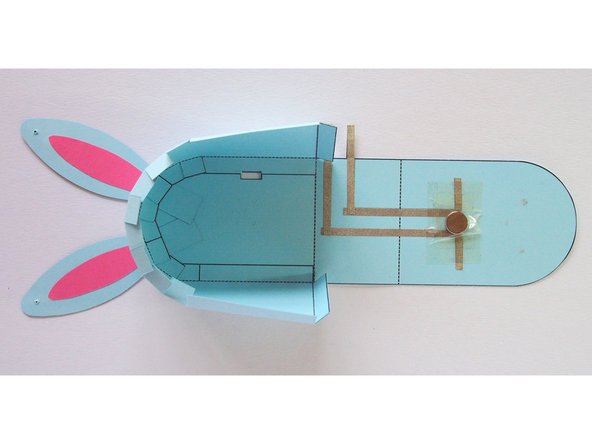
Fold the rabbot up and glue the body closed
-
-
-
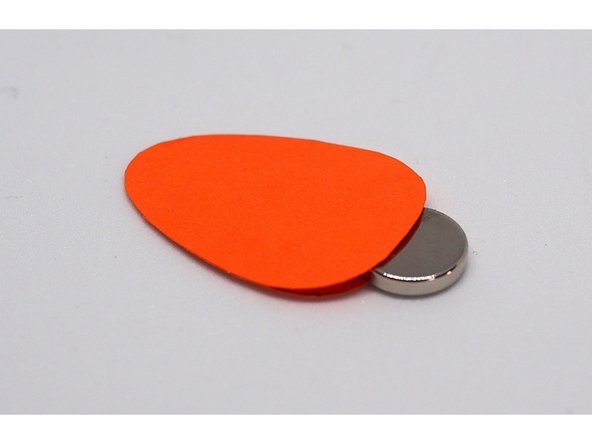
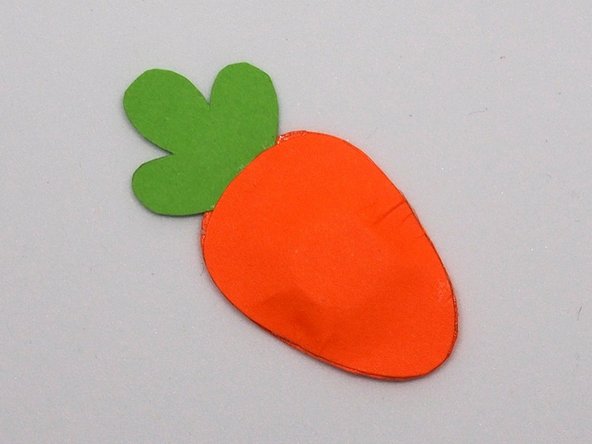
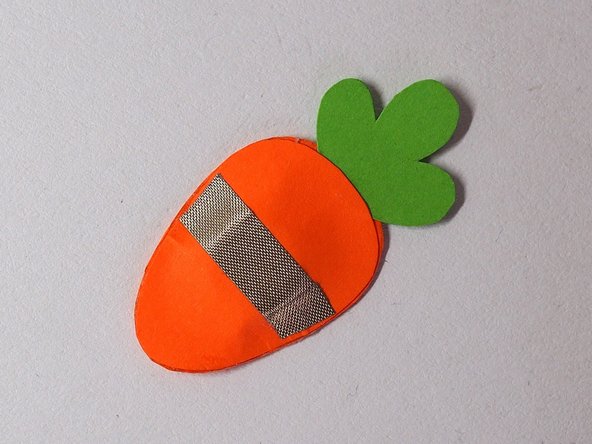
Glue the two halves of the carrot together, leaving a pocket open at the top for the magnet
-
When the glue is dry, slide the magnet into the pocket
-
Attach the carrot stem then glue the pocket shut
-
-
-
Add a strip of Maker Tape to one side of the carrot, making sure that it's on top of the magnet (since that's where it'll stick best to the Rabbot)
-
I used a piece of 1/4" tape to give the carrot more conductive area, but you can also just put two pieces of 1/8" tape side by side
-
-
-
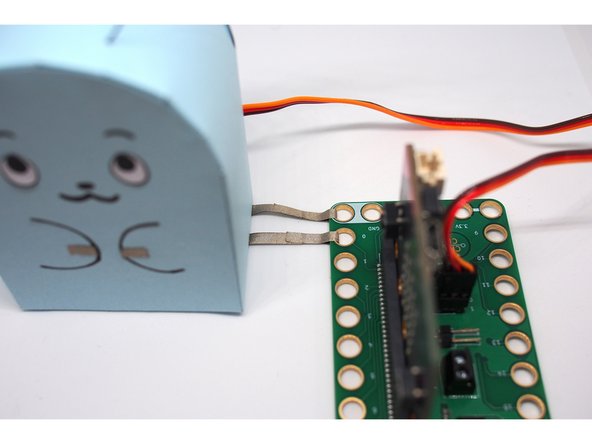
Connect the Maker Tape tabs to the Bit Board at pins GND and 0
-
I looped the Maker Tape around the holes in the Bit Board, like in Step 4 of this project
-
You can use a LEGO baseplate instead of looping the Maker Tape
-
Note that the order of which tabs connect to GND and 0 doesn't matter; the micro:bit is only sensing when they're completing a circuit
-
-
-
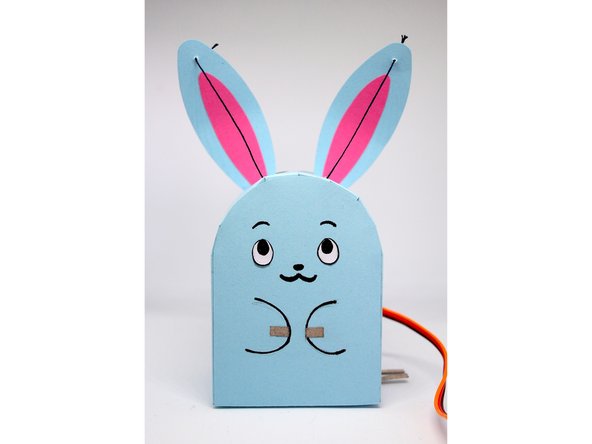
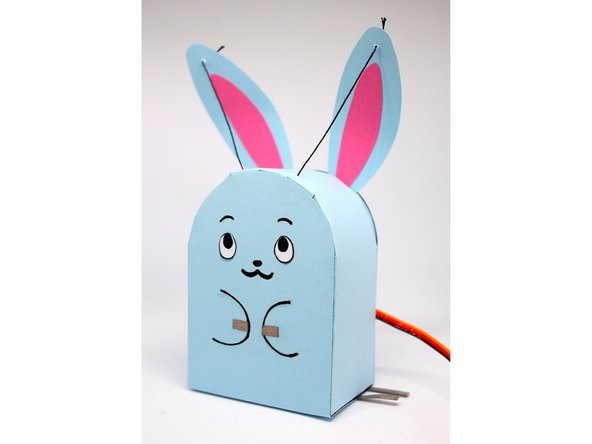
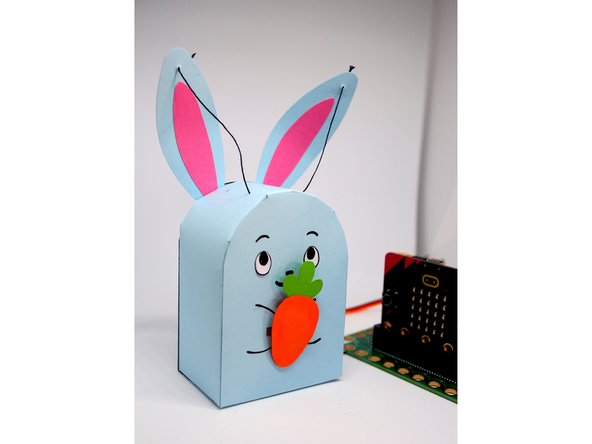
Give your Rabbot a carrot!
-
Its ears should bounce up and down, then stay upright in joy...
-
...but if you take the carrot away, the ears will droop again
-
If it's not working, make sure that the Maker Tape on the back of the carrot is contacting both pieces of tape on the body
-
It's best to store the Rabbot with its ears fully extended so the paper doesn't stay permanently drooped. One thing you can try to make the ears more springy is to attach a thin strip of plastic to the back of ears
-


Attached Documents
