
Introduction
The Crazy Circuits Invention Board can act just like a USB keyboard when we plug it into a computer. This allows us to control our mic and camera when doing videoconferencing.
Video Overview
Featured Document
-
-
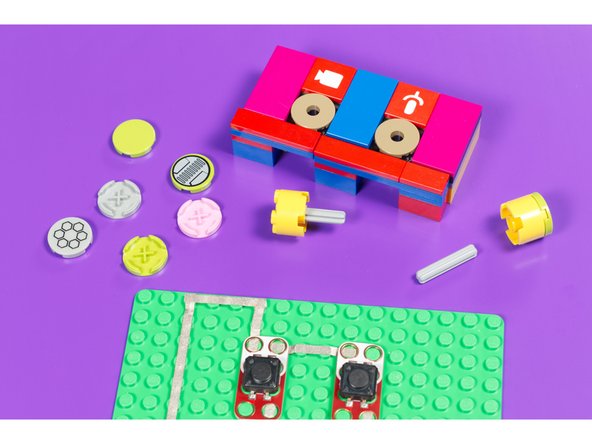
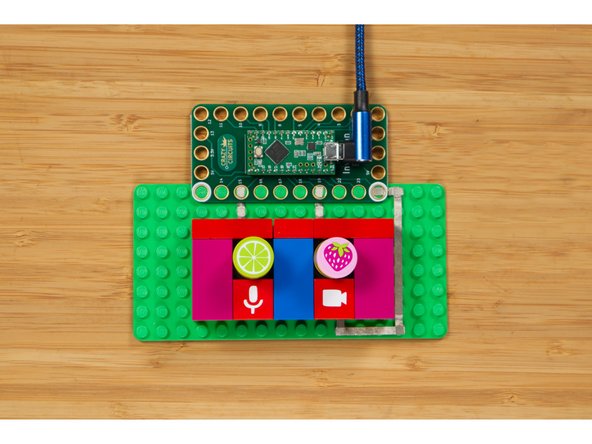
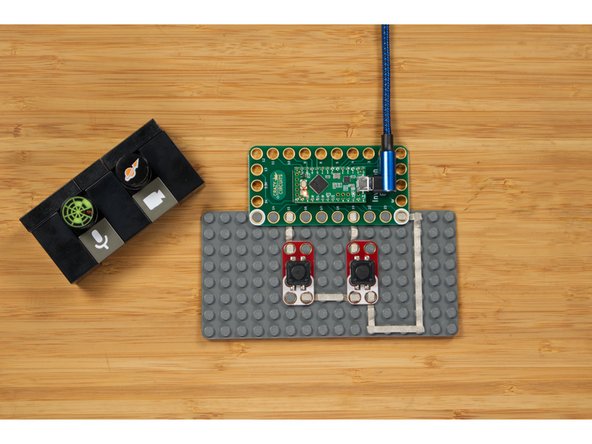
Use a LEGO baseplate to determine the layout of your circuit. You'll need space for the Invention Board, two Jumbo Pushbuttons, and Maker Tape to connect it all together.
-
-
-
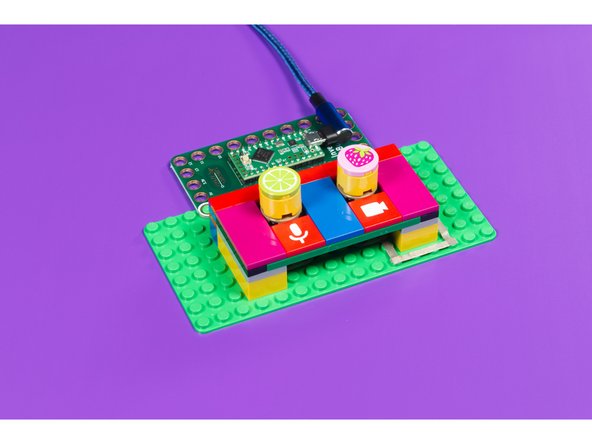
Plan out your LEGO build. You'll want to fit the LEGO on top of the circuit, so getting it all lined up, and leaving room for the Maker Tape is the challenge here.
-
It may be helpful to build the top LEGO part before you get all of your components in place so you can determine the needed spacing.
-
-
-
If you haven't built a LEGO button before, check out our LEGO to Jumbo Pushbutton guide for some good tips.
-
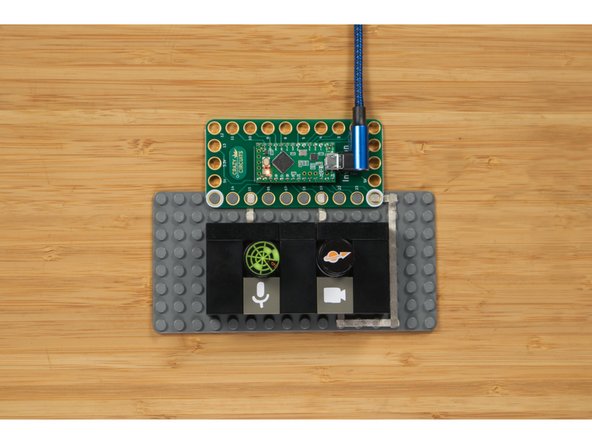
You can use button covers that are plain or that have fun graphics on them.
-
Tip: Lime means you can't hear me and strawberry means you can't see me!
-
-
-
If you've never used our Invention Board before we recommend that you read the user guide and install the correct software.
-
Find the code you'll need in our GitHub repository under Meeting Controls. We have versions that work for Google Meet, Zoom, and Microsoft Teams.
-
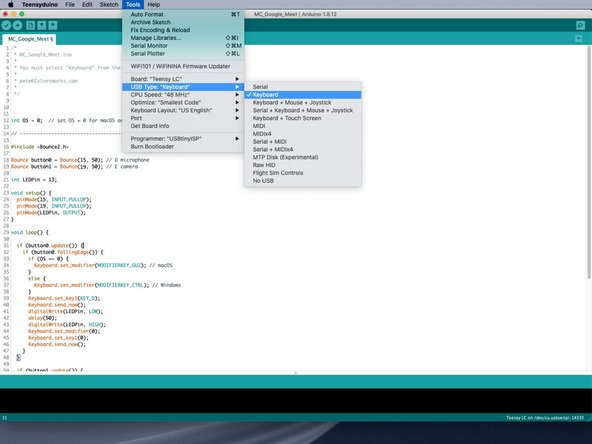
In the Teensyduino software you'll need to select "Keyboard" under the Tools -> USB Type menu.
-
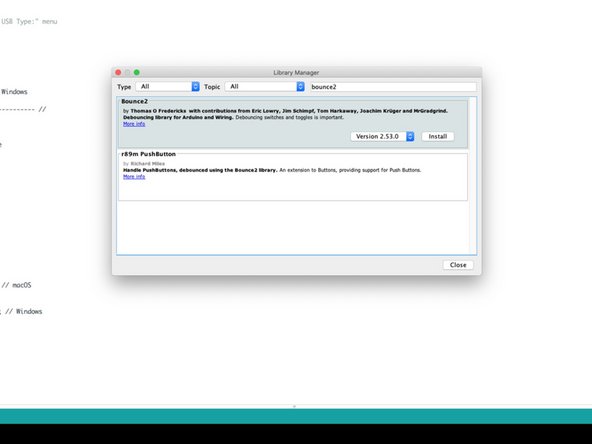
You'll need the Bounce2 library for your sketch. If it's not installed you will be warned when you try to compile or upload your code. You can easily add it using the Library Manager.
-
Upload the code to the Invention Board. The software will tell you if it worked properly. Once uploaded, you are all set!
-
-
-
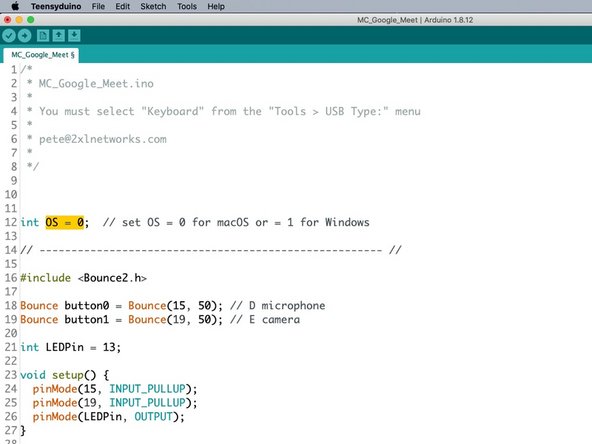
There is one thing you may need to change in the code. Look for the line that has OS = 0 in it. If you are using a Mac set this to 0 and if you are using Windows set it to 1.
-
There is a section in the code that will send a different key combination depending on your operating system. Often key commands on Windows use the Control key while key commands on the Mac use the Command Key, so this flag takes care of that.
-
-
-
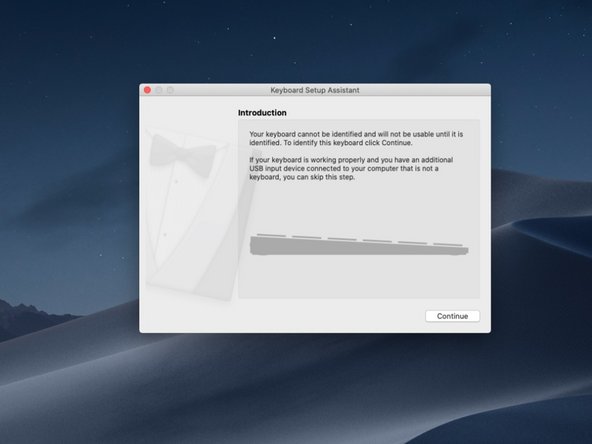
The first time your computer sees the new "keyboard" plugged it in may show a window asking you to help identify the new keyboard. You can just close this helpful wizard as it isn't really helpful in this case.
-
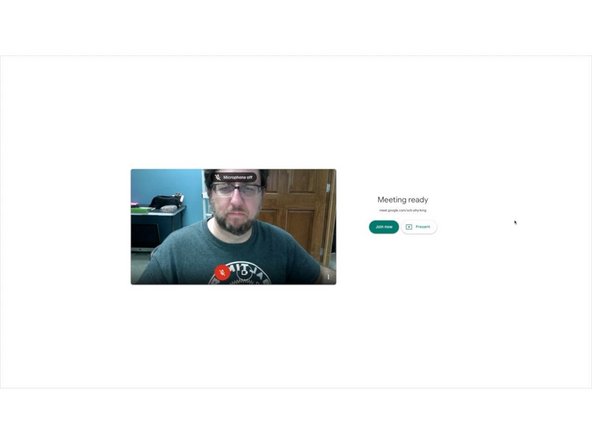
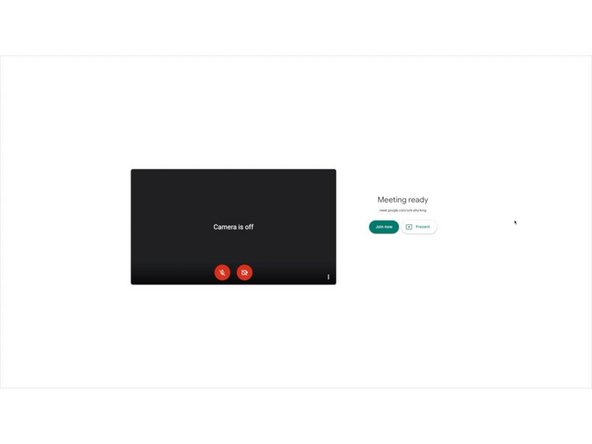
Launch your videoconferencing software and test it out! We're using Google Meet so when we press the left button we toggle the mic and when we press the right button we toggle the camera.
-
For the Microsoft Teams version controlling the camera only works in the desktop client, not the browser. Google Meet and Zoom should work fine based on the latest releases of their software.
-
-
-
We decided to make two versions of our Meeting Controls device, a "fun" version for the kids, and a "serious" version that is perfect for business.
-
You can easily make different covers that are interchangeable depending on your mood.
-
If you want to change the code to support other software with different key commands check out the key codes for Teensyduino.
-
Since we have a vinyl cutter we added small icons for a mic and camera to our flat LEGO pieces. If you want to add them you can find vector files in the Icons directory.
-


Cancel: I did not complete this guide.
One other person completed this guide.
Attached Documents
