
Introduction
Build a simple circuit with Maker Tape, an LED, and a coin cell battery to make a robot toy light up.
Video Overview
Featured Document
-
-
Print and trace the robot parts onto a white chip board with a black permanent marker.
-
Or, design your own! The body should be at least 4 inches wide to leave enough space for the circuit.
-
-
-
Cut out the shapes using heavy-duty scissors or a craft knife.
-
Once the shapes are cut, go over the edges with the permanent marker to make them look finished.
-
-
-
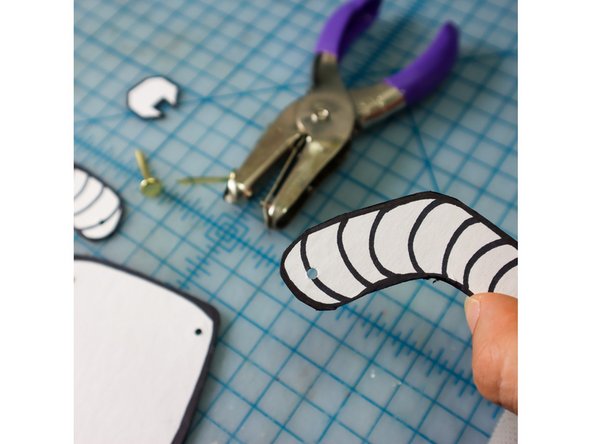
Use a hole punch to put a small hole in the arm and the body. If you have one, use an 1/8 inch hole punch.
-
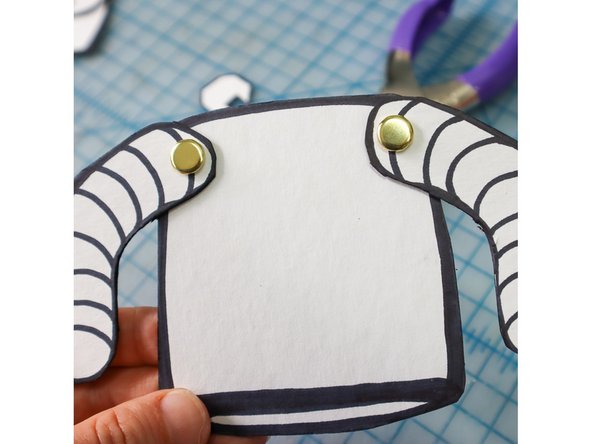
Insert the Paper Fastener through the holes in the arms and then the body. Flatten the legs on the other side making sure that they don't go over the edge.
-
-
-
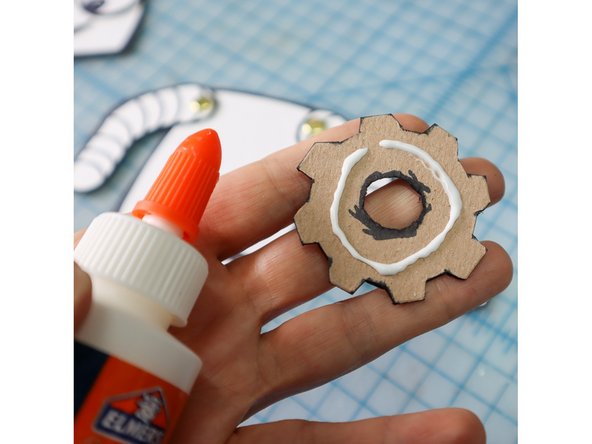
Glue the remaining parts together with tacky glue.
-
Let dry.
-
-
-
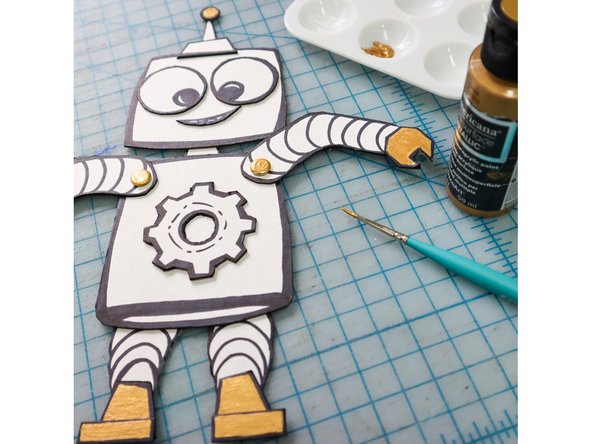
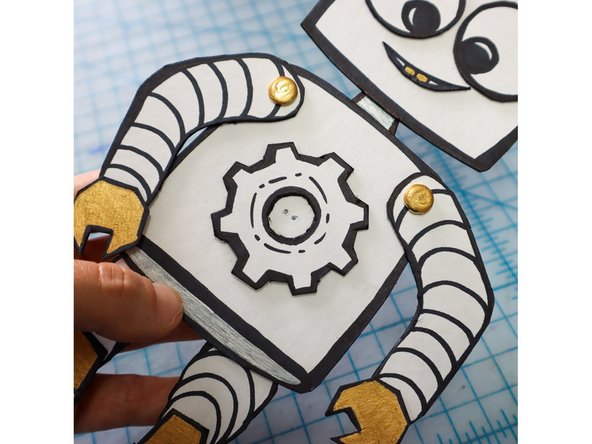
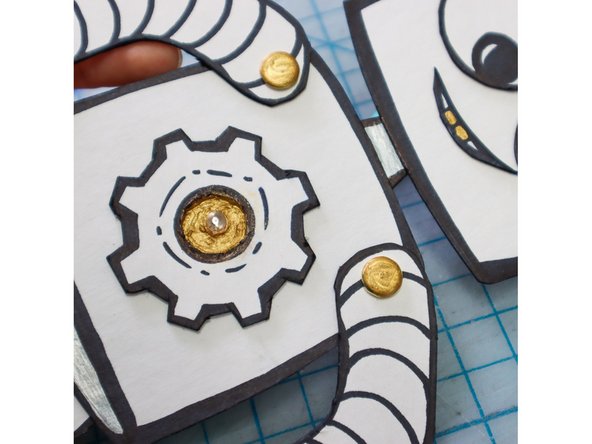
Paint or color in the accents. I used silver and gold paint in the example.
-
-
-
Make two holes in the center of the body where you would like the LED to go.
-
Place the LED through the holes from the front of the robot's body.
-
Fold the LED's legs flat against the back of the chip board.
-
-
-
Adding paint, glitter, or metallic marker around the LED will amplify its light.
-
-
-
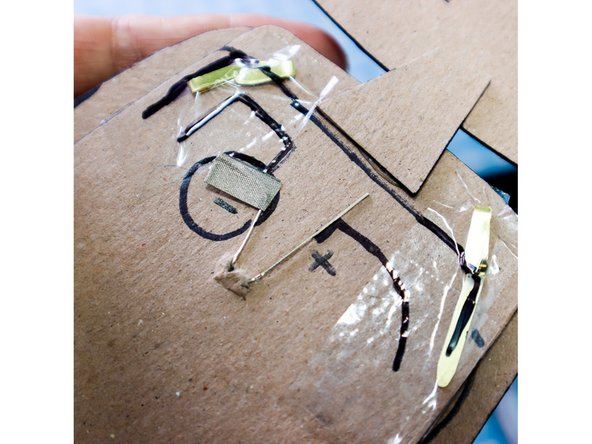
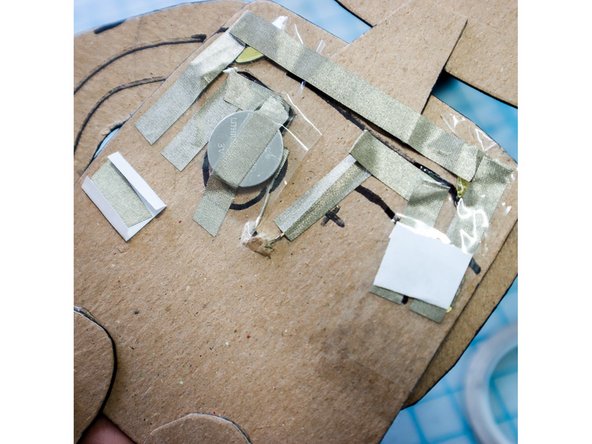
Add clear or electrical tape on top of the paper fasteners to prevent them from shorting the circuit.
-
Reference the circuit diagram in the PDF file. Use a black marker to sketch the circuit onto the back of the robot.
-
Start by wrapping the negative leg of the LED with a piece of Maker Tape.
-
-
-
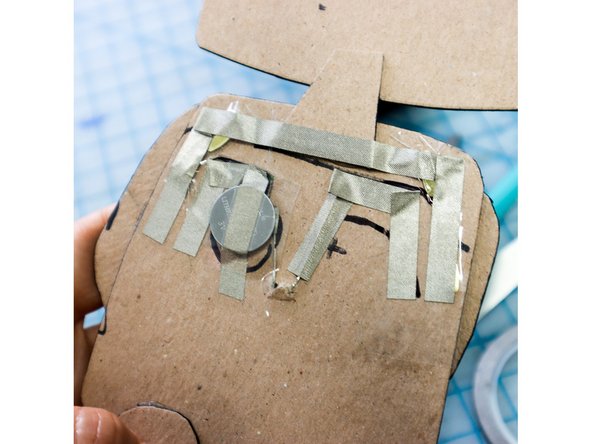
Place the battery on top of the Maker Tape with the negative side down.
-
To secure the battery, place enough Maker Tape over it to keep it in place.
-
Continue laying the Maker Tape as shown.
-
-
-
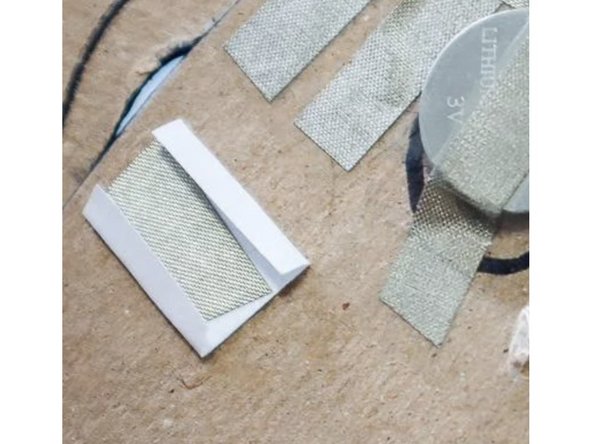
Make a paper flap by placing a piece of Maker Tape onto a small square of paper and folding over the edges as shown.
-
Tape the flaps in place over the two spots where the circuit is broken. Squeezing both of these switches will now close the switch.
-
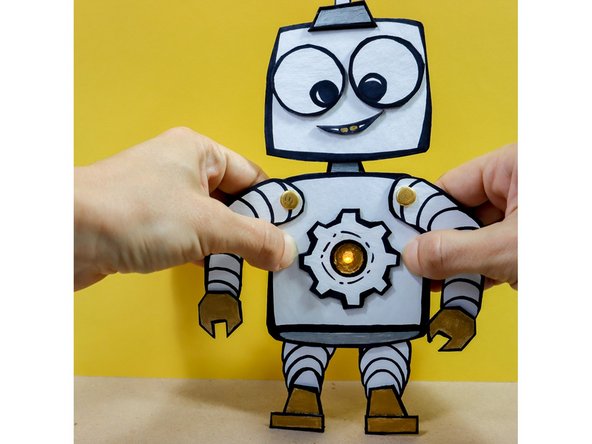
The LED will turn on if you squeeze his armpits. tee hee!
-
-
-
Now your new robot friend is ready to play and light up!
-


Cancel: I did not complete this guide.
One other person completed this guide.
Attached Documents
