
Introduction
With a few 3D printed parts and a LEGO Compatible servo you can build this simple gripper mechanism.
Note: We have other grippers as well. This is an experimental design that is optimized for 3D printing minimal parts.
Tools
Parts
- LEGO Axle 8 (3707)
- LEGO Axle 4 (3705)
- LEGO Axle 4 with End Stop (87083) × 2
- LEGO Bushing (6590 / 42798) × 4
- LEGO Pin without Friction Ridges (3673)
- LEGO Axle to Pin Connector (3749 / 6562)
- LEGO Technic Through Axle Connector with Bushing (32039 / 42135) × 2
- LEGO Beam 5 x 0.5 with Axle Holes on each end (11478 / 44864) × 2
- Brick Compatible 270 Degree Servo
- 3D Printed Parts
Video Overview
-
-
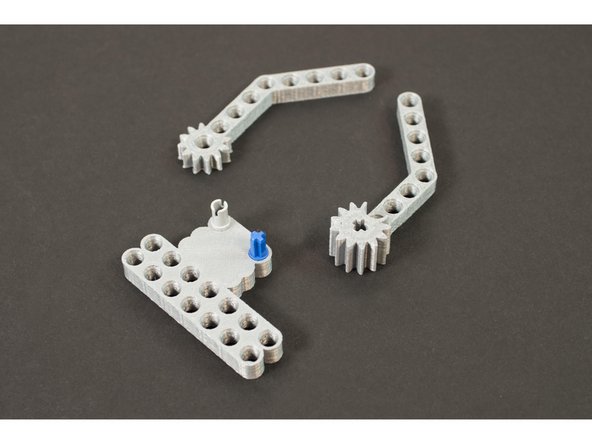
We've provided the STL files for the 3D printed parts. You need a left and right "finger" and one base. We designed a few different bases to allow for different mounting options, but you only need to print one of them.
-
You can find the files for our Gripper here: https://github.com/BrownDogGadgets/3D-Pr...
-
Every 3D printer is a little different, and may not be as well calibrated as it should be. If you find parts a bit too loose we recommend trying to print at 99%, or 98% or increasingly smaller by a percent. That may be enough to help them fit properly.
-
-
-
Gather all the LEGO parts needed.
-
We've provided links to each part in the introduction.
-
You can often make substitutions for different LEGO parts if you don't have the exact part.
-
For instance, if you have an axle that is too long, it may still work. If your axle lacks and end stop you can try to use a half bushing in its place.
-
As always, this guide should serve as a starting point, and we hope you use it as inspiration to make your own creations!
-
-
-
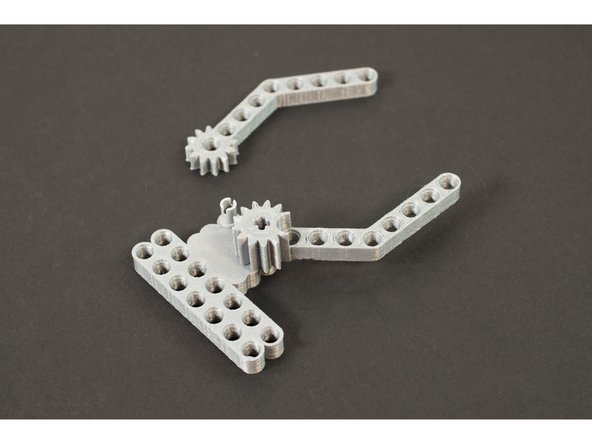
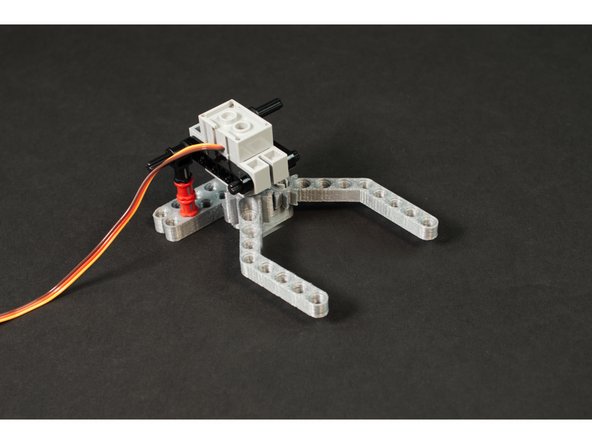
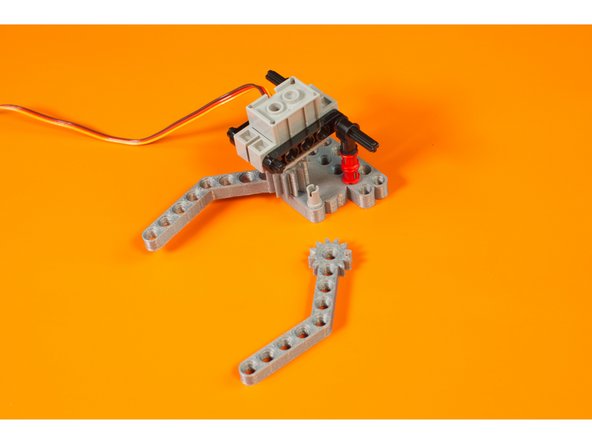
The Gripper fingers are designed with interlocking gears so that when the servo turns one finger, the other finger turns and they meet, closing the fingers together.
-
For the finger with the taller gear we'll use the LEGO Axle to Pin Connector (3749 / 6562). The taller gear piece allow for the servo to connect to it.
-
For the finger with the shorter gear section we'll use the LEGO Pin without Friction Ridges (3673)
-
Note that the finger with the shorter gear can lift off fairly easily. This will be helpful when we calibrate the servo in Step 8.
-
-
-
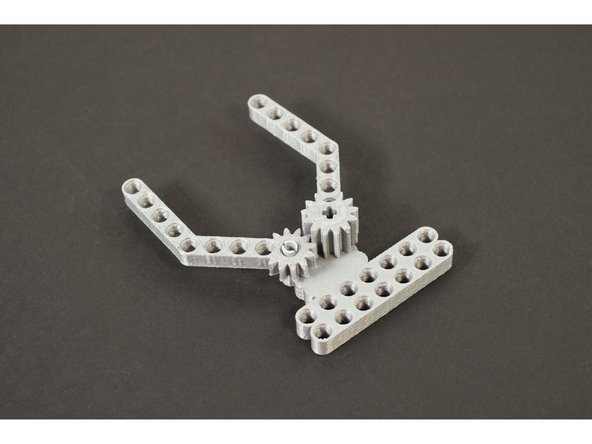
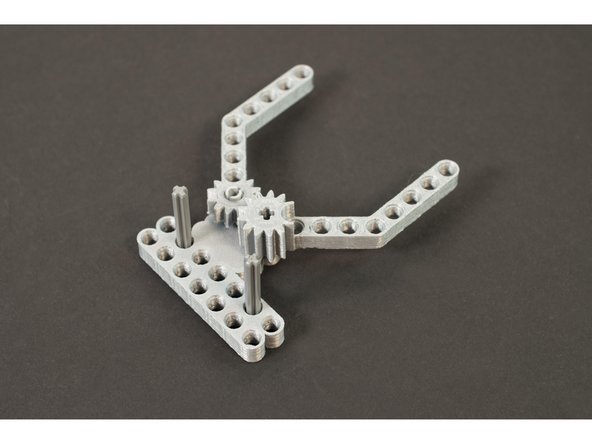
Next we'll add the two LEGO Axle 4 with End Stop (87083) parts into the appropriate holes in the base.
-
Once inserted add two of LEGO Bushing (6590 / 42798) parts onto each one to hold them in place.
-
That's the base half of our Gripper. You can put it aside so we can build the servo side.
-
-
-
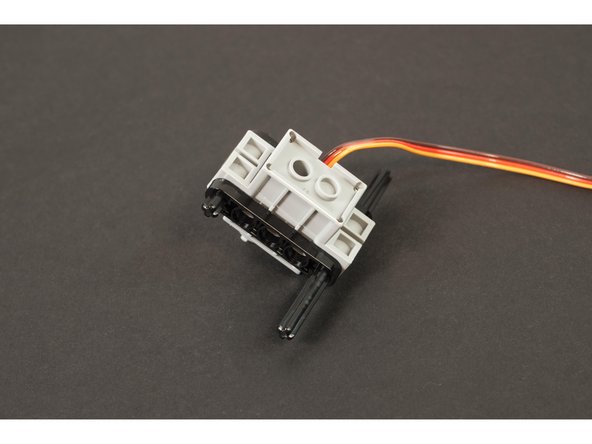
The LEGO Compatible servo has two holes for side mounting. We're going to slide the LEGO Axle 8 (3707) and the LEGO Axle 4 (3705) through the holes, making sure we've got the shorter one on the end closest to the servo shaft.
-
Next, slide the two LEGO Beam 5 x 0.5 with Axle Holes on each end (11478 / 44864) parts into place on the axles.
-
And finally, slide the two LEGO Technic Through Axle Connector with Bushing (32039 / 42135) parts into place on the longer axle.
-
As mentioned, you could use a shorter axle, but a longer one provides other mounting options. As always, when it comes to LEGO there is more than one way to do it!
-
We've now got the top of (the servo side) of our Gripper done!
-
-
-
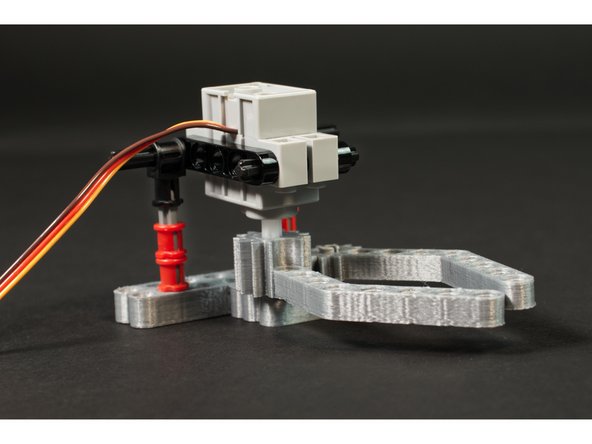
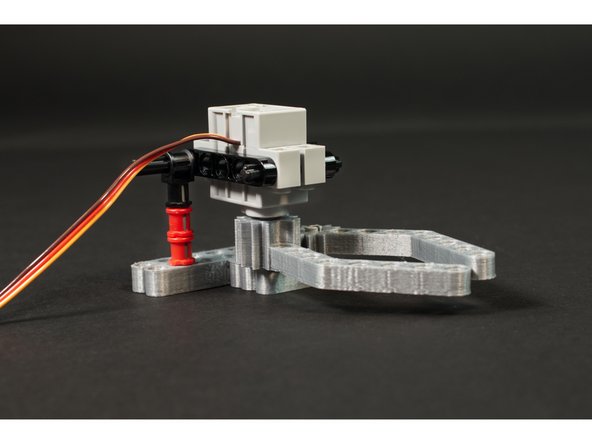
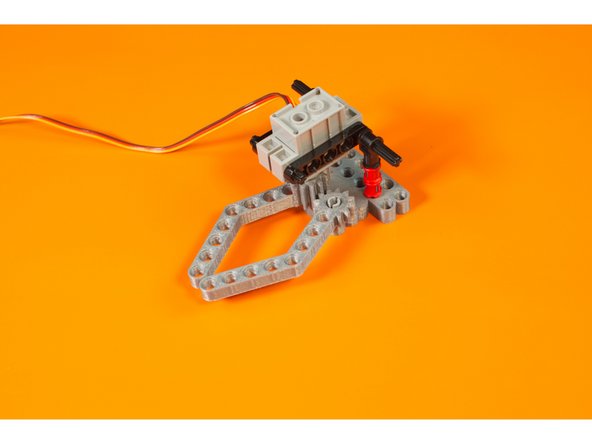
Connecting the two parts of our Gripper is a matter of sliding them together.
-
The one tricky part is that you'll need to line up the plus shaft of the servo to the plus hole on the finger. This shouldn't be too difficult, as you can rotate the finger to line things up.
-
Our Gripper is complete! Now we need to make it move.
-
-
-
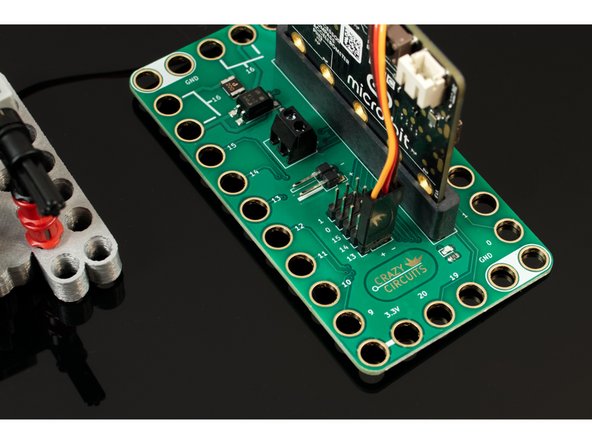
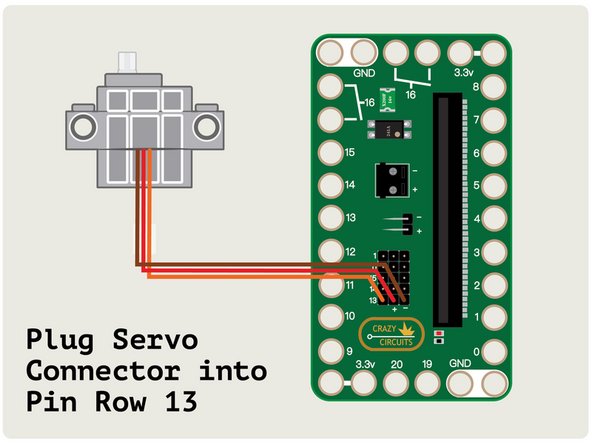
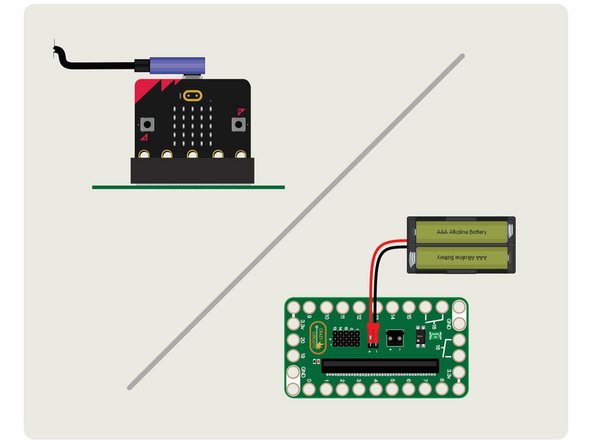
The next two steps that will test our Gripper assume you are using a Bit Board and micro:bit, but if you use another controller the concept will be the same.
-
Connect the servo to Pin Row 13 on the Bit Board.
-
The orange wire will go to Pin 13, the red wire will go to the center pin, which provides + (positive) power, and the brown will will go to the - (negative) pin.
-
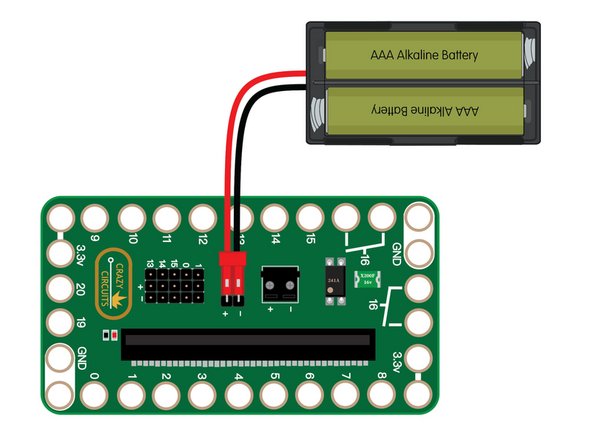
If you are using a micro:bit V2 it may be able to power a single servo via the USB cable plugged into your computer. A micro:bit V1 will need an external battery pack. (We always recommend an external battery pack when using servos, no matter which version micro:bit you have.)
-
-
-
Connect a USB cable to the micro:bit and then plug it into your computer.
-
We'll be using makecode.microbit.org to program our board. It uses a simple drag and drop block interface.
-
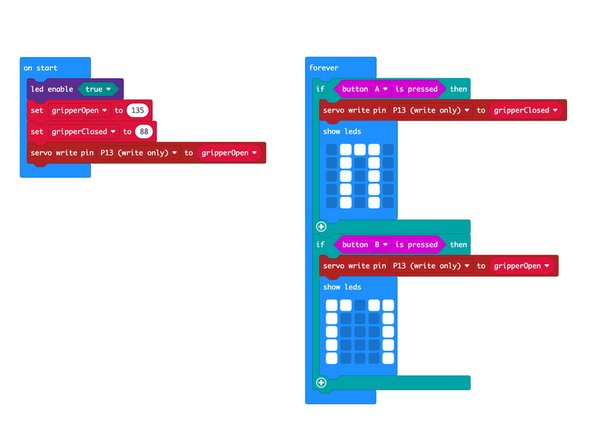
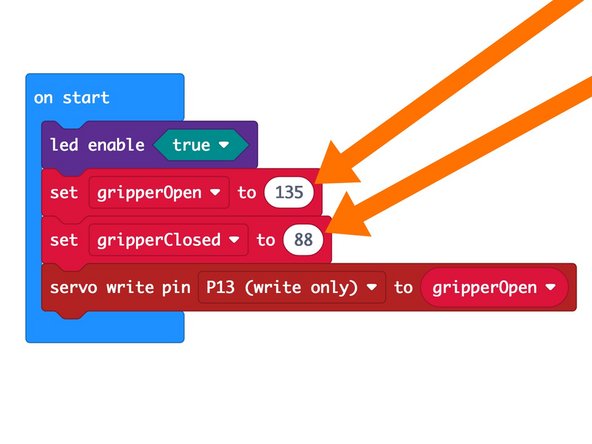
We're going to load the following code for our Gripper Setup program: https://makecode.microbit.org/_8YWhd77MD...
-
Our code will use the built-in buttons on the front of the micro:bit to open and close the fingers. A will close, and B will open.
-
-
-
With the code loaded and enough power for your servo, it's time to test things out and do some calibration.
-
There are two ways to calibrate how far the servo moves for the open and close positions.
-
In the code you can adjust the numbers for the variables gripperOpen and gripperClosed by changing the numbers. These represent the angles that the servo will move the shaft to.
-
You can also adjust the angle by turning off power to the Bit Board and servo and then removing the shorter arm and gently rotating the taller geared arm to the correct position.
-
You may actually need a combination of the two adjustment methods to get things just right.
-
Once you've got it figured out though, it should be all good. Remember you can rotate the finger on the plus shaft of the servo in 90 degree increments.
-
If you are new to using servos, check out the guide on our LEGO Compatible 270 Degree Servo.
-


Cancel: I did not complete this guide.
One other person completed this guide.
