
Introduction
Use an Ultrasonic Distance Sensor and a 7 Segment Display with a micro:bit and our Bit Board to see how far away an object is.
Video Overview
Featured Document
-
-
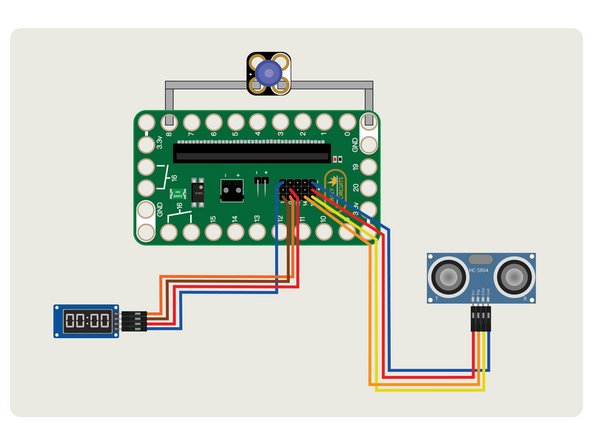
Gather your components. You will need a micro:bit, a Bit Board, Jumbo 10mm LED, Ultrasonic Distance Sensor, 7 Segment Display, and some 1/8" Maker Tape.
-
Make sure to view the PDF for a full diagram and more information about this project.
-
Build on a LEGO baseplate with a few LEGO pieces used to raise up the Bit Board on the edges.
-
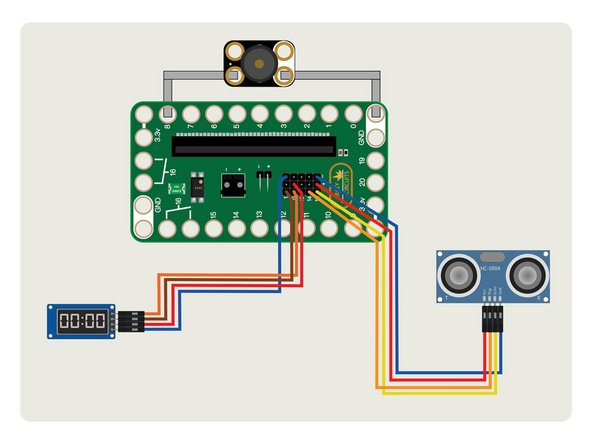
Add the LED as show, connecting it to Pin 8 and Ground with Maker Tape.
-
Make sure you have the polarity correct for your LED or it will not light up. Positive goes to Pin 8. Negative goes to Ground.
-
-
-
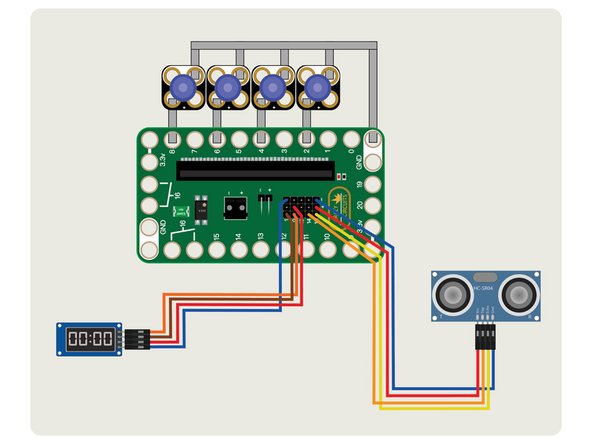
Add the Ultrasonic Distance Sensor by connecting it to the header pins on the back of the Bit Board using jumper wires.
-
You can use any color jumper wire for your connections, just make sure they are connected to the correct pin.
-
It can be easier to plug in all the jumper wires before plugging your micro:bit into the Bit Board.
-
You'll notice a high-tech solution to mounting our sensor and our display... rubber bands and LEGO!
-
-
-
Add the 7 Segment Display by connecting jumper wires to the correct pins on the module and the Bit Board.
-
You should now have your LED connected with Maker Tape, and your sensor and display connected with jumper wires.
-
-
-
In the next few steps we'll walk you through how to add code extensions.
-
This is meant to be informational, and you can follow along if you like, but if you use the code we provide it will all automagically work.
-
If you already know how to add code extensions you can skip to Step 8 where we provide the code.
-
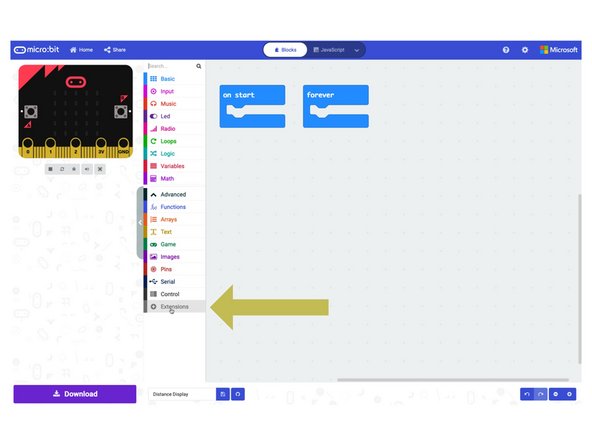
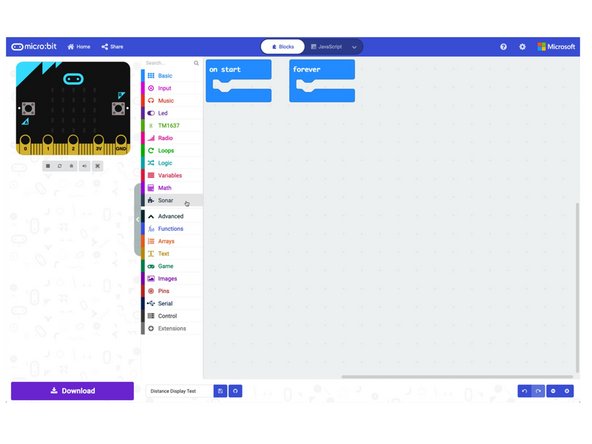
In the MakeCode editor, click on Extensions under the Advanced menu on the left.
-
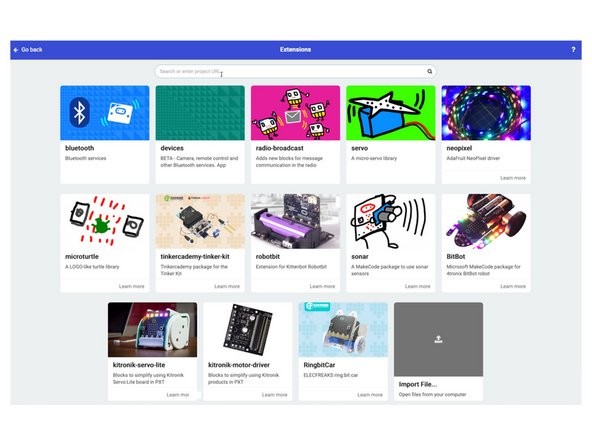
You'll go to the extension repository where you can browse or search for extensions.
-
-
-
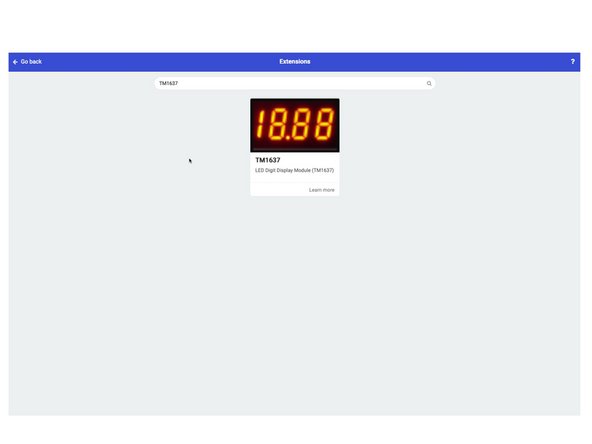
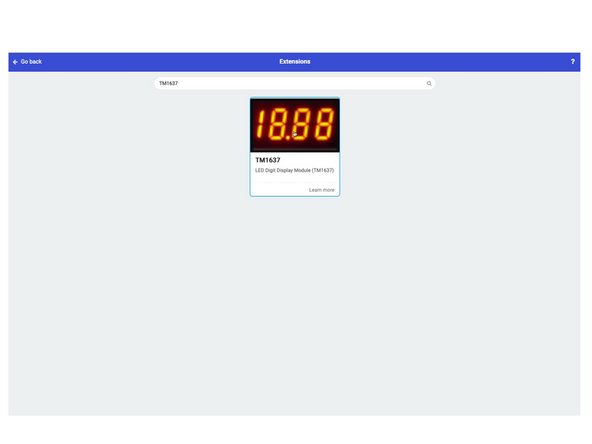
We're going to type TM1637 into the search bar, and we should get the TM1637 as a result.
-
Click on it to add it to your program. This will allow us to use our 7 Segment Display.
-
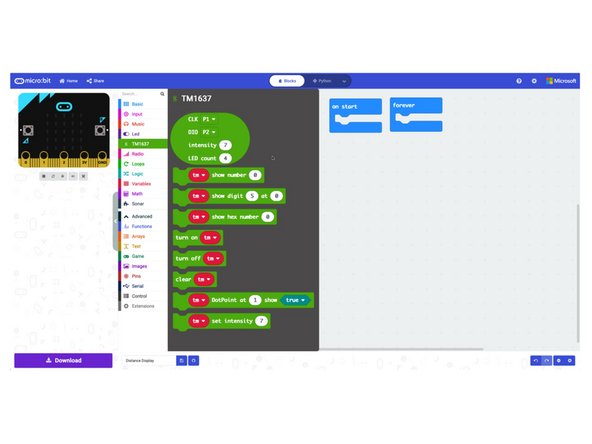
After it is added you'll see it appear in the left menu.
-
-
-
Now we'll add the Sonar extension using the same procedure.
-
This extension will allow us to use the Ultrasonic Distance Sensor in our program.
-
-
-
For our new extensions you can click on their names in the left menu and you'll see the new functionality you now have in your program.
-
Some extensions add a lot of new functions, and some are quite minimal, adding just a few new functions.
-
-
-
Connect a USB cable to the micro:bit and then plug it into your computer.
-
We'll be using makecode.microbit.org to program our board. It uses a simple drag and drop block interface.
-
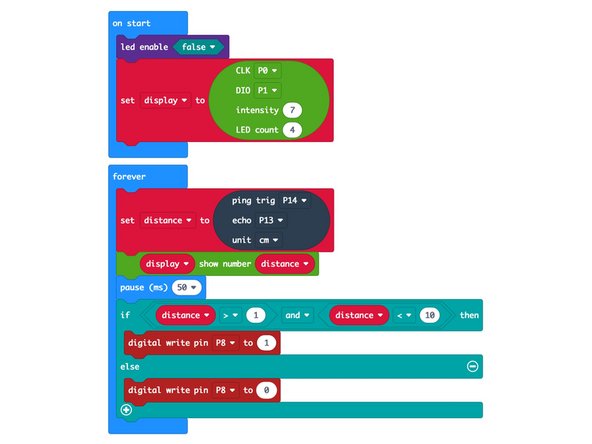
We're going to load the following code for our Distance Display program: https://makecode.microbit.org/_VHVhgkV43...
-
Once the code is loaded you should start to see numbers on the display.
-
The included PDF has more information about the code if you want to dig deeper.
-
-
-
Once you've got everything assembled and you've loaded your code, you can test it out!
-
Move your hand towards and then away from the sensor. You should see the numbers change, showing the distance your hand is from the sensor in centimeters.
-
If something isn't working right, double check all of your connections and make sure you've loaded the code properly.
-
-
-
Our program is pretty simple, and you should be able to figure out how to change the numbers that cause the LED to turn on as a starting point to expanding this project.
-
Maybe you can add a Piezo Speaker and play a tone or a melody when someone gets too close.
-
You could also add more LEDs and have different LEDs turn on to indicate different distances.
-
Like many circuits, we've got a cause and effect thing going on. Think about what you want to happen when an object is a certain distance from the sensor, and work through what is involved in altering the circuit (or the code) to do what you want.
-


Cancel: I did not complete this guide.
2 other people completed this guide.
Attached Documents
